


Dry Fly Hooks - A Digression
Because the selection matters - Part 7a of N


The base of almost all flies, wet or dry, is a hook. I say “almost all” because somewhere in the mix we have tube and shank flies. The fly pattern’s design may get the fish to take the fly, but it’s the hook that has to hold the fish. The hook also has to be suited for the pattern for which it is being used.
Forty some years ago, while in grad school, I started working at a local fishing and hunting store with a stated aim of building up the fly fishing side of the business. The standard dry fly hook at that time was the Mustad 94840, about as sorry an excuse for a hook as you could find in a month of Sundays. The Japanese hooks by the likes of Tiemco were just starting to show up on the US market. While better finished and more uniform than the Mustad hooks these ones were of singularly poor quality. You could break a Tiemco streamer hook with the 5 or 6x (1 to 2 lb. test) tippet we had back in those days.
My search for a better hook lead me to Partridge of Redditch. Here are a couple of packs of the standard dry fly hooks from back then.
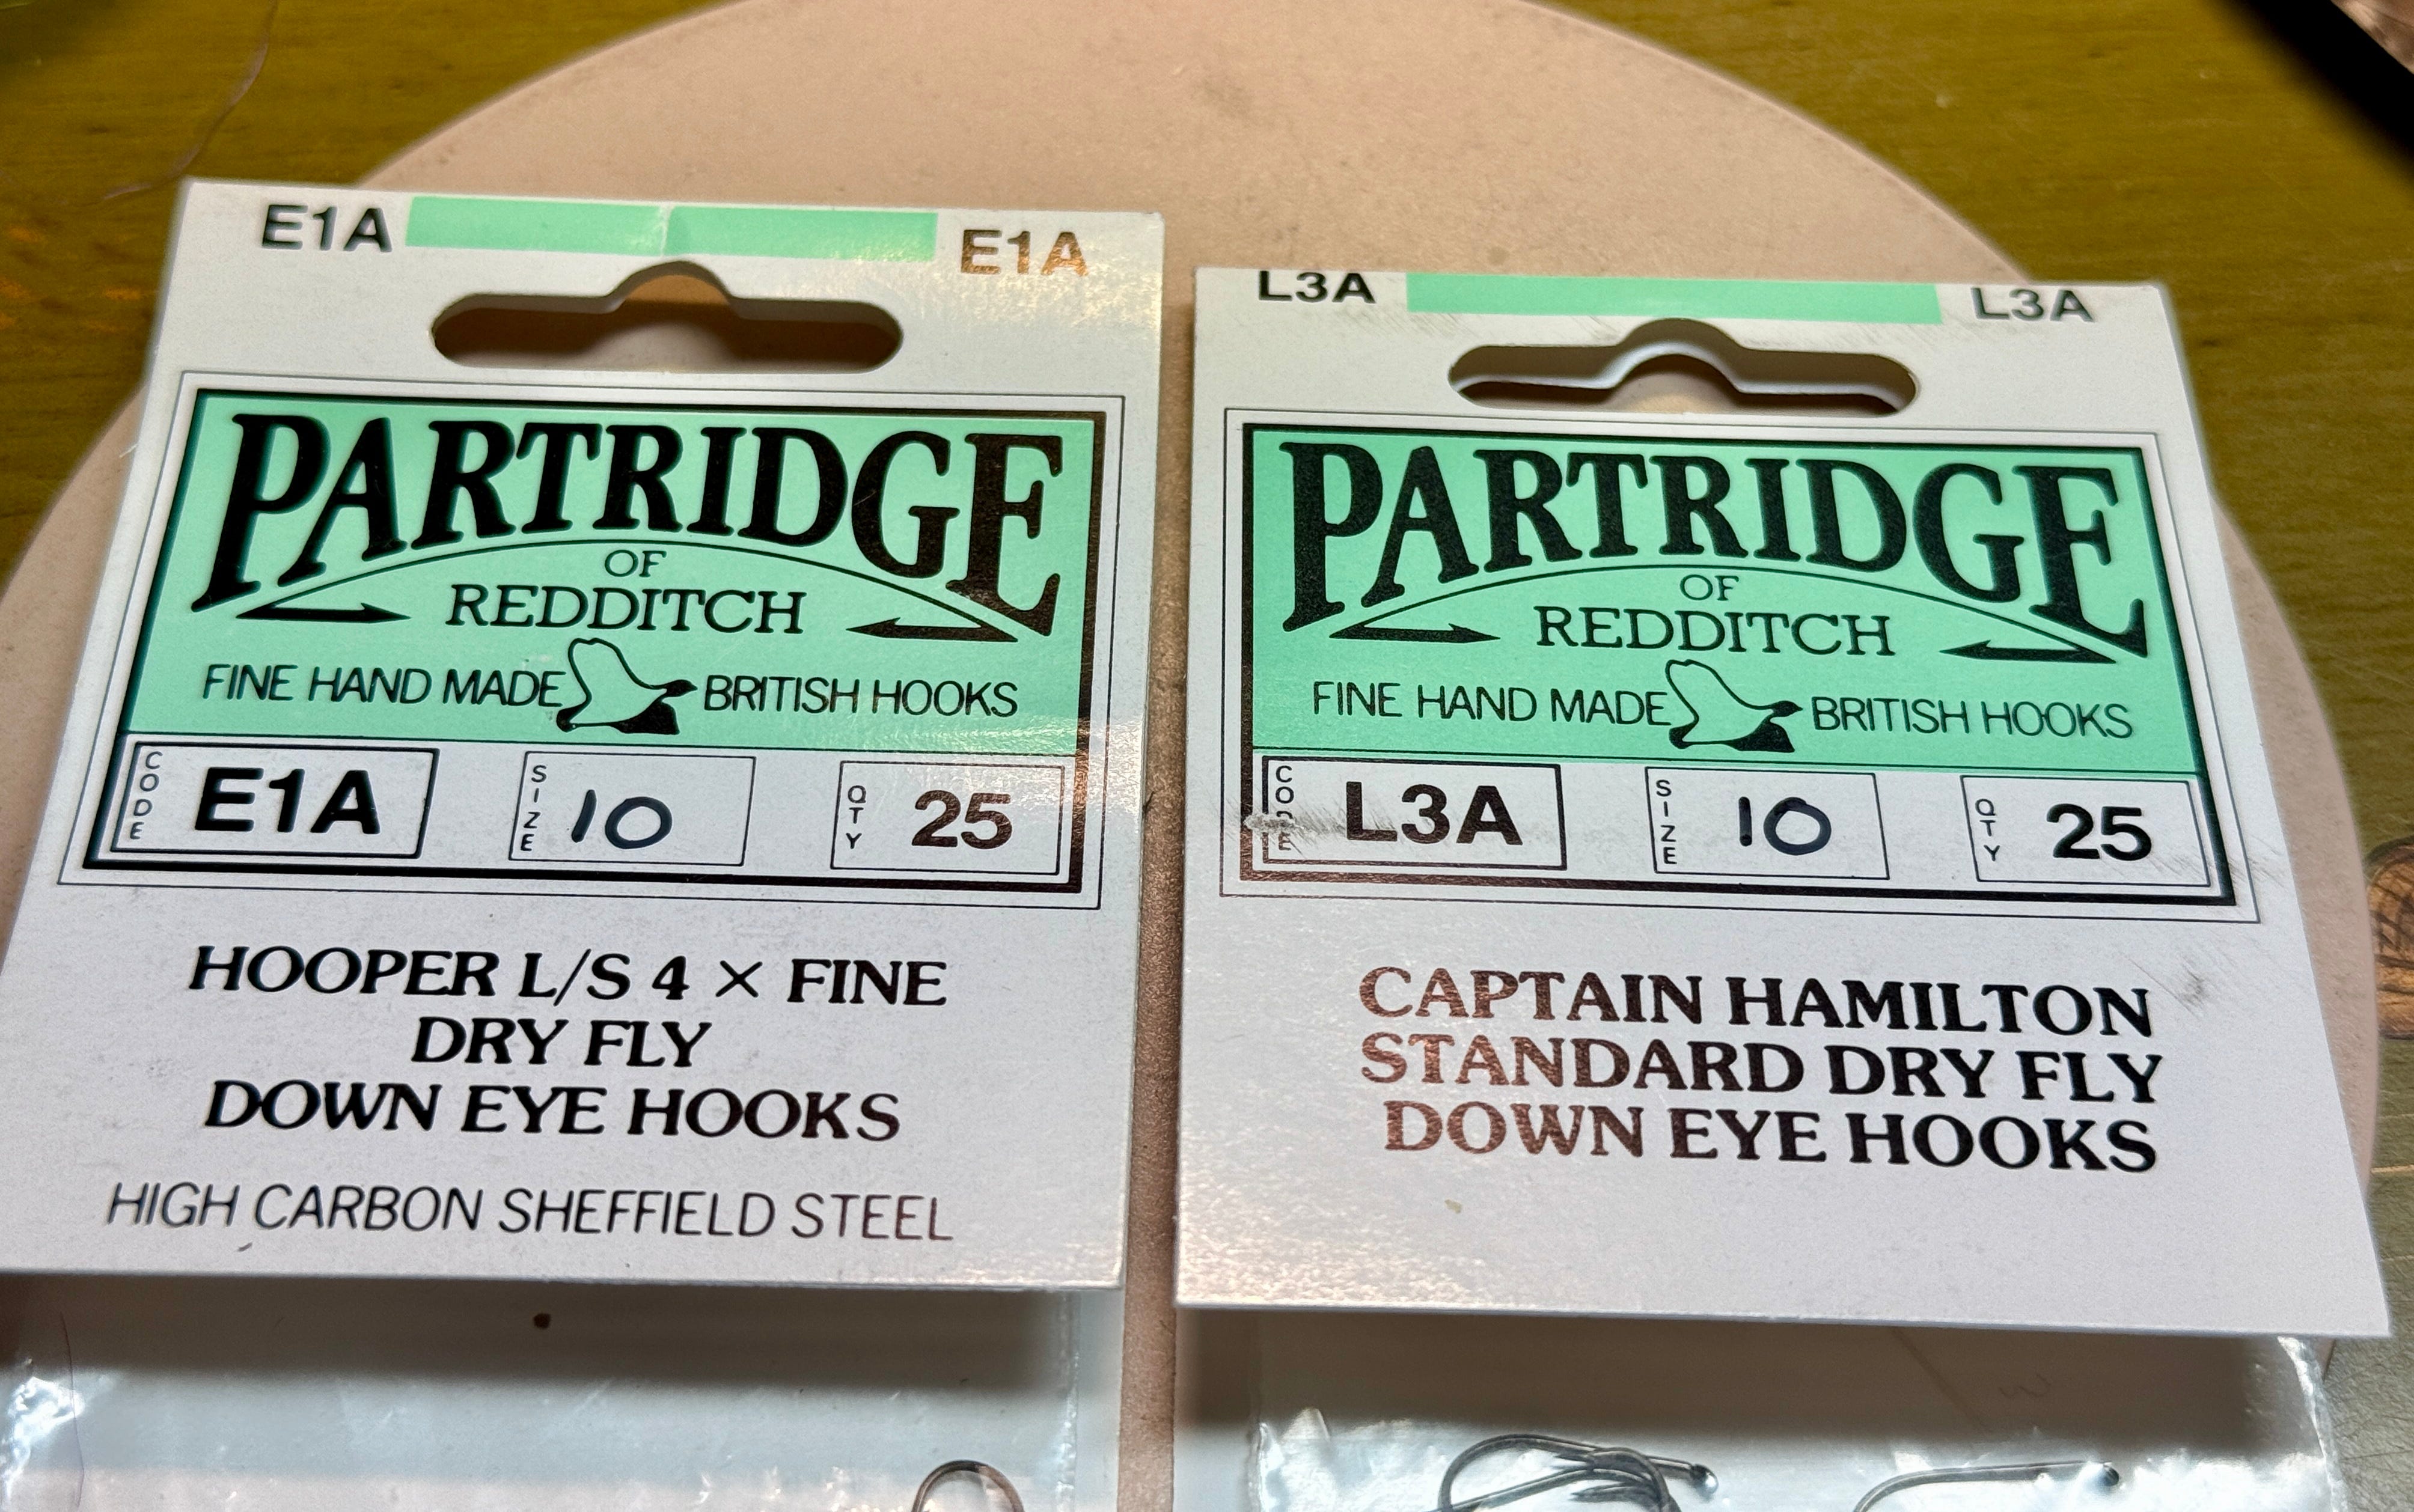
These were purpose built hooks. The Capt. Hamilton series was designed by a Scot living in New Zealand in 1910 or thereabouts. He asked Hardy to get some built for him. Hardy turned to Partridge and the L3A was born. The L3A and its progeny the L5A are my favorite caddis hooks and I still scour the earth looking for stock to buy. The E1A Hooper hook was originally designed and built as the Orvis Premium by Sealey’s in the UK. It was then modified a bit by Ken Hooper at Partridge and sold as the E1A. The E1A was a slightly longer shank than the standard dry fly hook of the era and tied an elegant looking Catskill style dry and became the prototypical American dry fly model. In fact the Tiemco 100 and the Daiichii 1170/1180 show their heritage in the E1A.
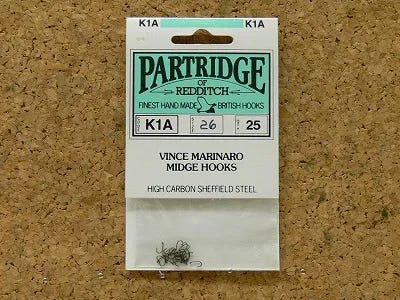
Vince Marinaro, the wizard of the Letort went to Partridge to have them build a midge hook to his specifications. The K1A Vince Marinaro partridge hook has an extremely wide gape and an offset point in order to allow a good hold on size 22-26 flies.
Hooks matter. That is why all these people were running to the likes of Partridge to get hooks built to a specific design. Back in the early 1980s a Partridge hook used to cost about 22 cents while a Mustad would cost about 7 cents. It used to take a lot of selling to get people to shell out the extra 15 cents per hook. The argument that always won the day was to ask if the buyer was willing to pay 15 cents to land a 20-inch trout on a dry fly.
Hooks have, arguably, come a long way since then, but I still find people struggling with hooks, sizes, shapes, etc. Let’s first look at the basic anatomy of a hook.

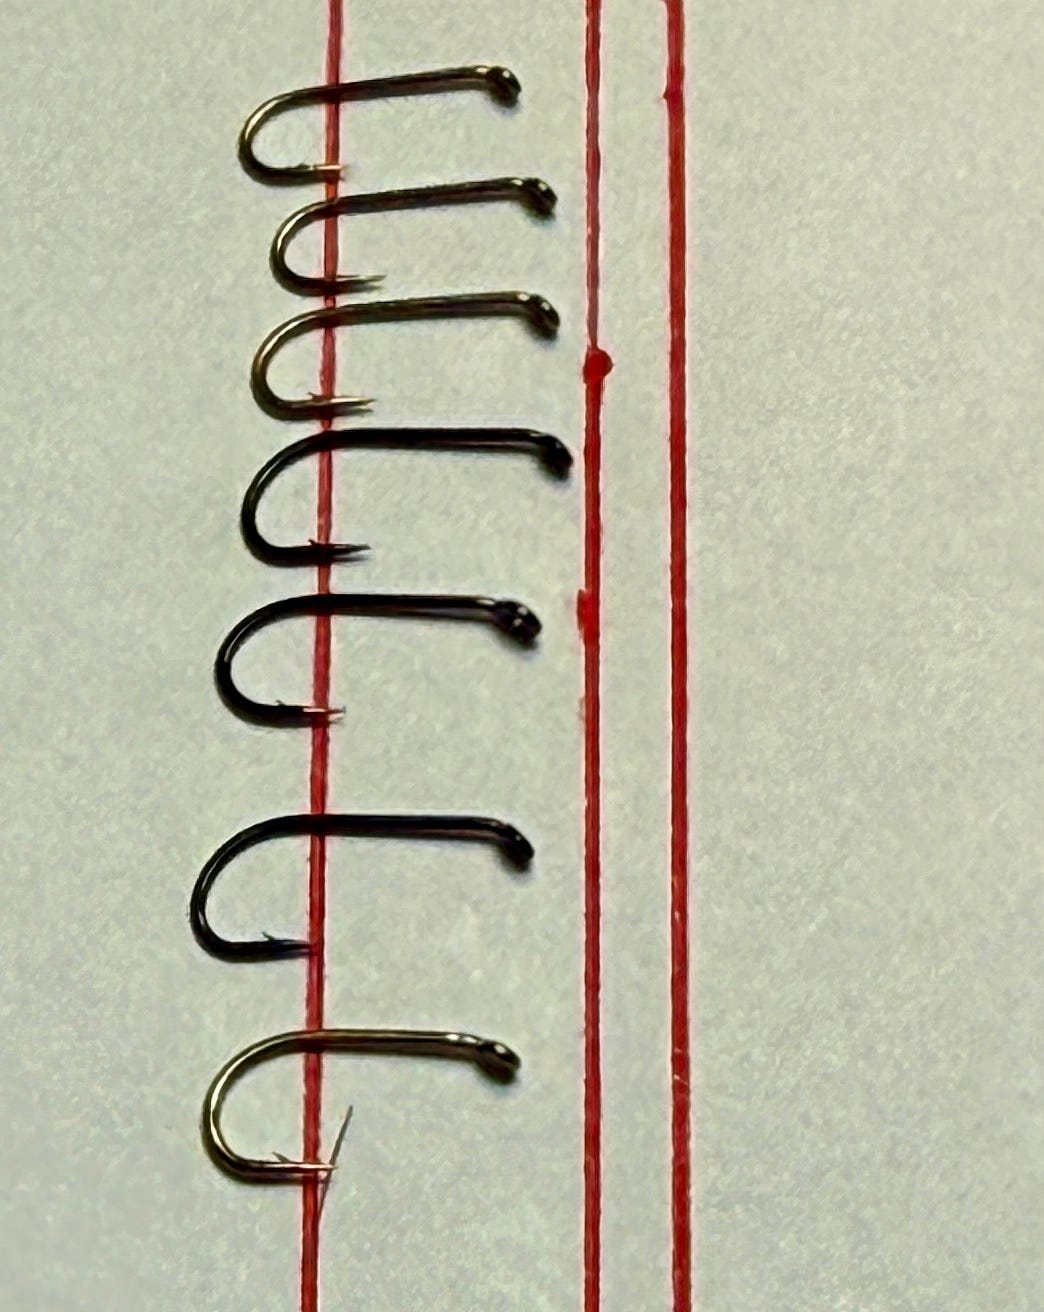
Unless the hook maker has completely lost it (and sometimes they do) the two important measurements of a hook are the shank length and the gape. The shank length is what holds the body of the dry fly and so defines the actual size of our imitation. The problem, of course is that the shank length can vary by as much as 20% depending on the hook pattern. This is why mentioning the hook size alone may not be enough. Here are a set of size 14 dry fly hooks from different manufactures.
The distance between the two outer lines is 10mm while the distance between the left and inner lines is 8mm. At this size the difference in size isn’t that much and I would submit any of those would probably cover the variance in the size of the naturals. As the hook get’s smaller, though, the variance will tend to increase. Here are a bunch of hooks that are #18s (or 17-19 for odd numbered hooks models) from different vendors.
Now the variation is much more meaningful. But the really important thing is how these hooks translate to the size of the actual insect. For instance, some typical Eastern mayflies and their typical sizes. Not being fully aware of both the size of the

natural and that of the hook can easily lead to fishing the wrong size of fly. Often by a lot.
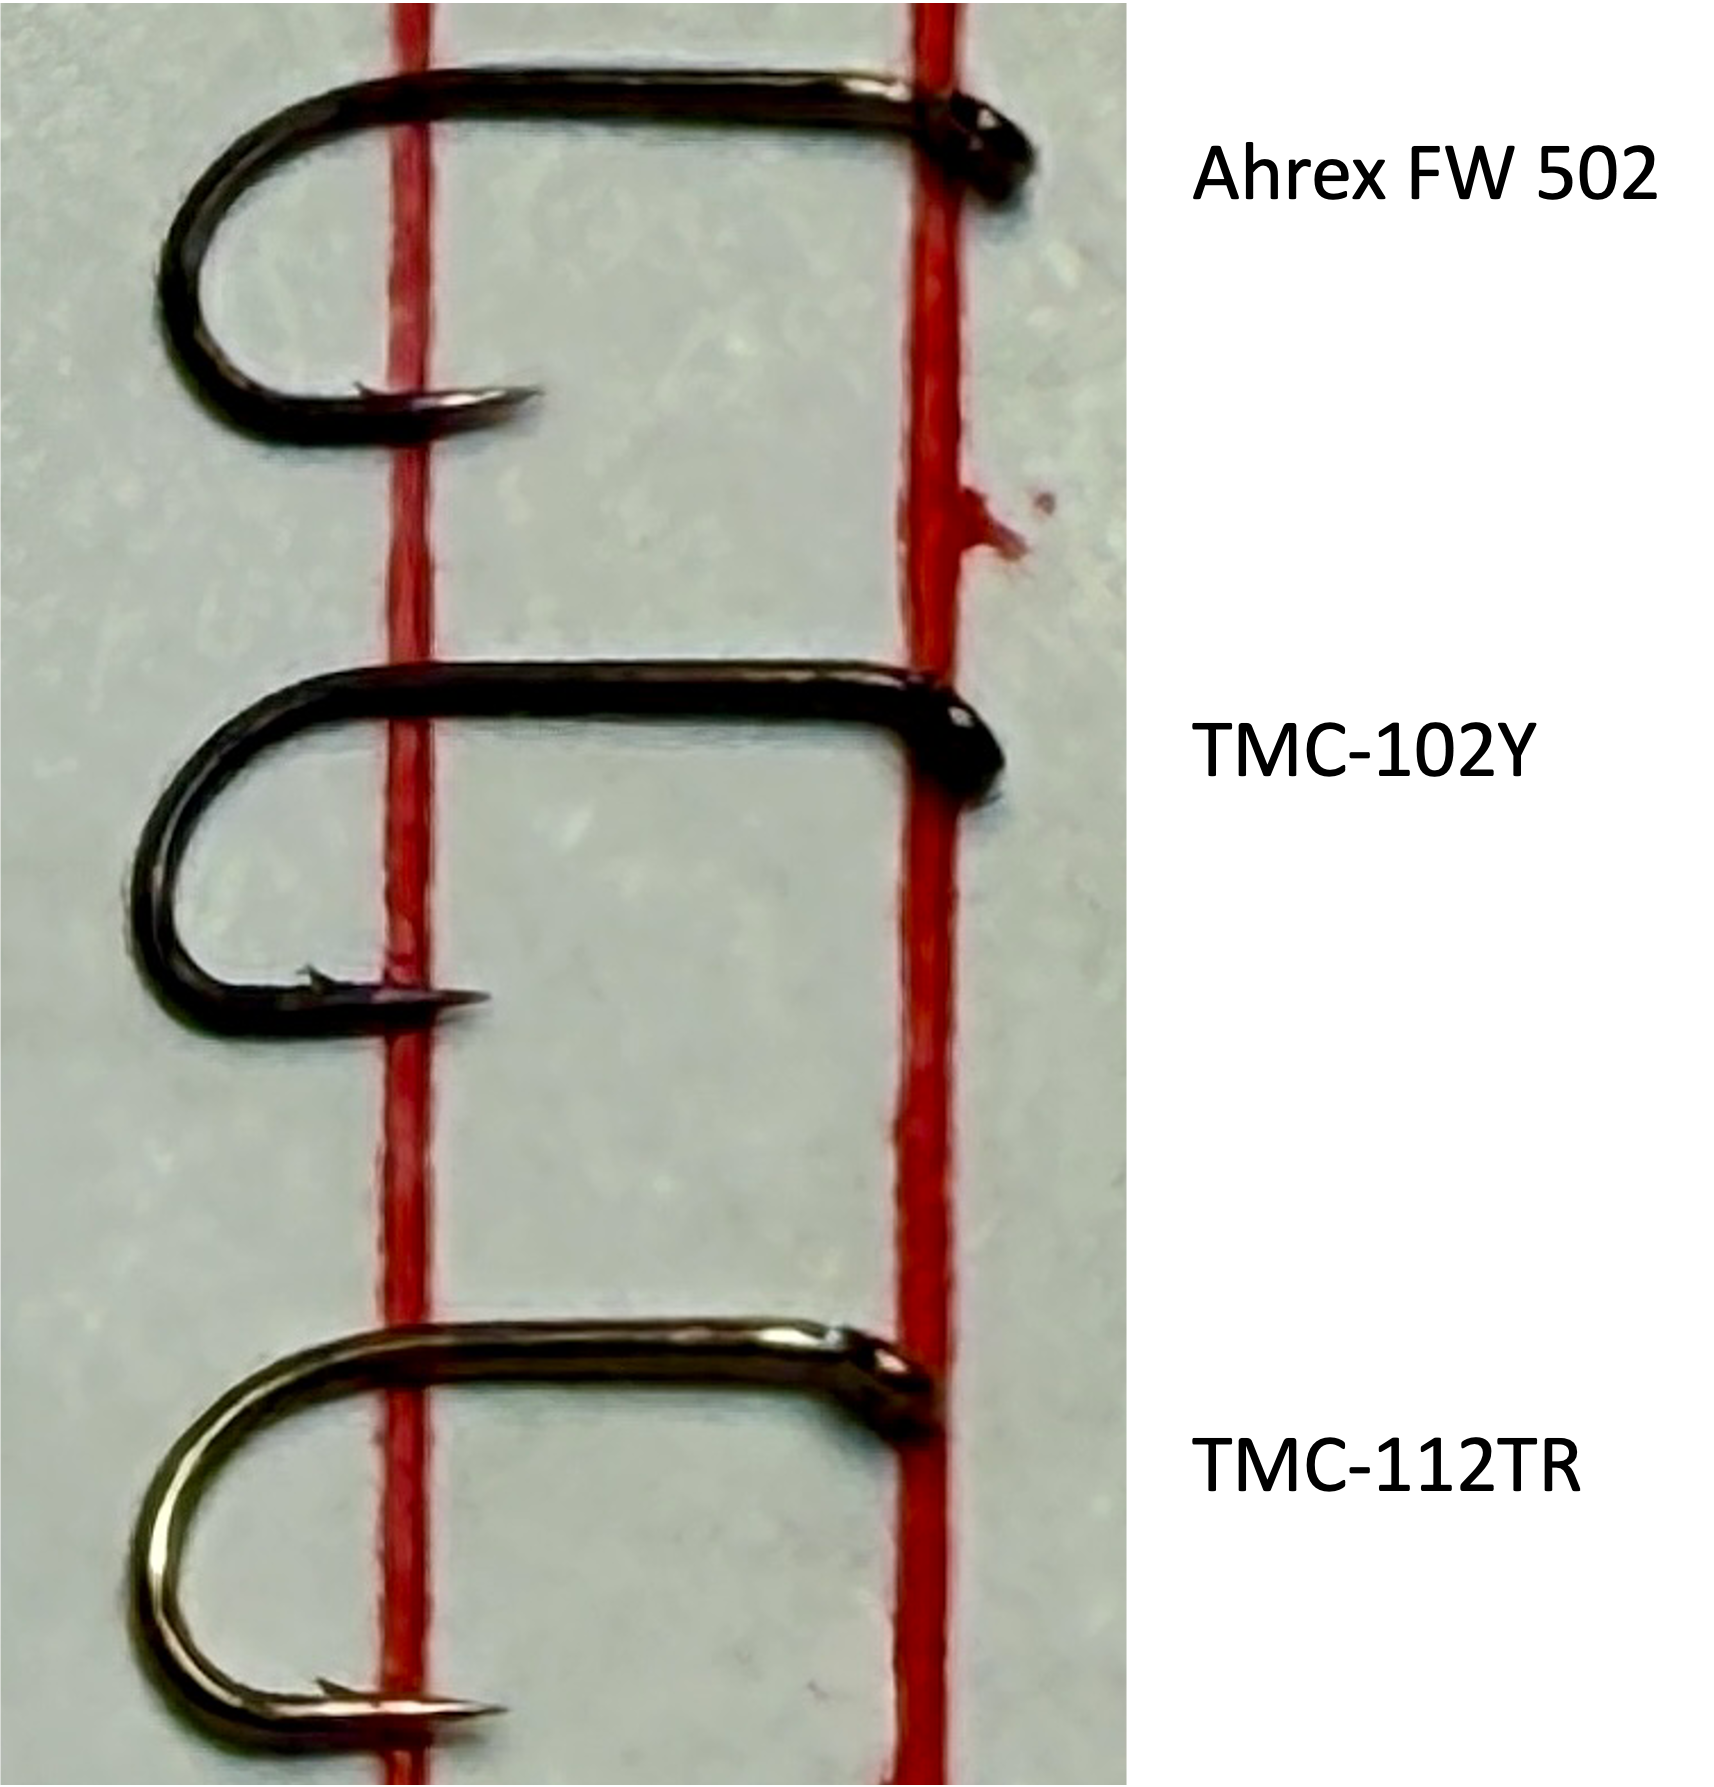
The next important measurement is the gape of the hook. The size of the gape affects two area of hook performance, the ability to actually hook the fish and the ability to hold onto the fish once it’s been hooked. Wider gape hooks have better hooking performance. Since the trout’s mouth is not a flat, even surface a wider gape has a better chance of finding purchase somewhere. Secondly narrow gape hooks, especially in the smaller sizes, have a tendency to just get a tiny grasp on the skin. A big or vigorous fish tears that hook out in no time. Wider gape hooks tend to bite deeper. The hooks shown below can all be used to tie flies that are about 3-4 mm long (so the equivalent of a Tiemco 100 size 20-22).
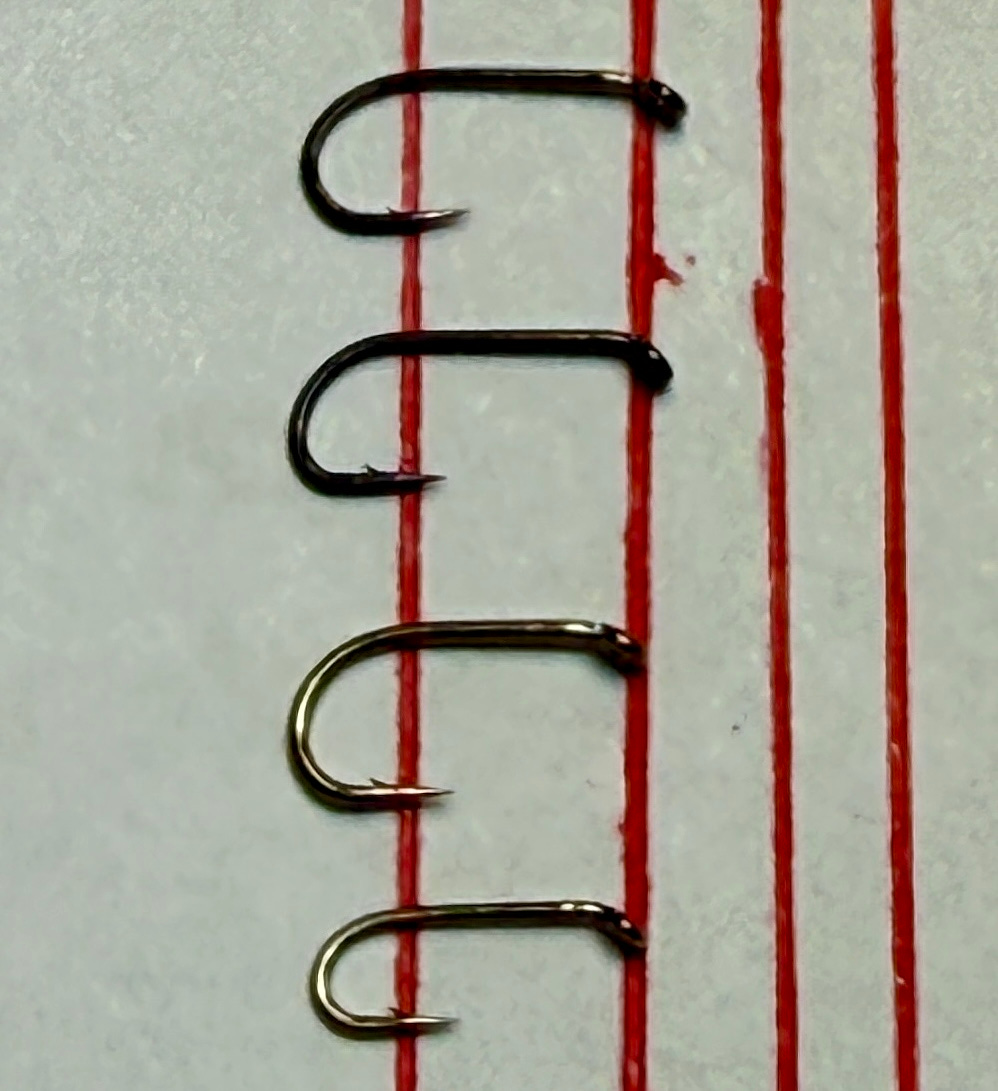
Of the 4 hooks shown 3 are made by the same company, Tiemco. The top hook is an Ahrex FW502, the other 3 are all by Tiemco - TMC 102Y, TMC-112TR and a TMC-100. The normal argument is that it’s easier to float the TMC-100 because it has less metal. In actuality the difference isn’t worth the price of the argument, and the poor hooking performance makes the TMC-100 in smaller sizes something that ought to be unconstitutional.
The answer to solving the gape problem often lies in using a short shank hook. Which is why I like using hooks like the TMC-112TR or TMC-921 which are 2 to 2.5X short. That means that a #17 TMC-112TR (2.5x short) has the shank length of a standard #22 but a gape slightly less than a 16. The TMC-112TR is the second hook up from the bottom in the picture above.
The second thing that affects the hooking performance of the hook is the front length. A longer front length, especially on a debarbed hook, holds the fish better. But for small hooks a long front length starts crowding the eye of the hook. Here’s a Mustad 94840 in a size 20 (courtesy flyhooks.org).
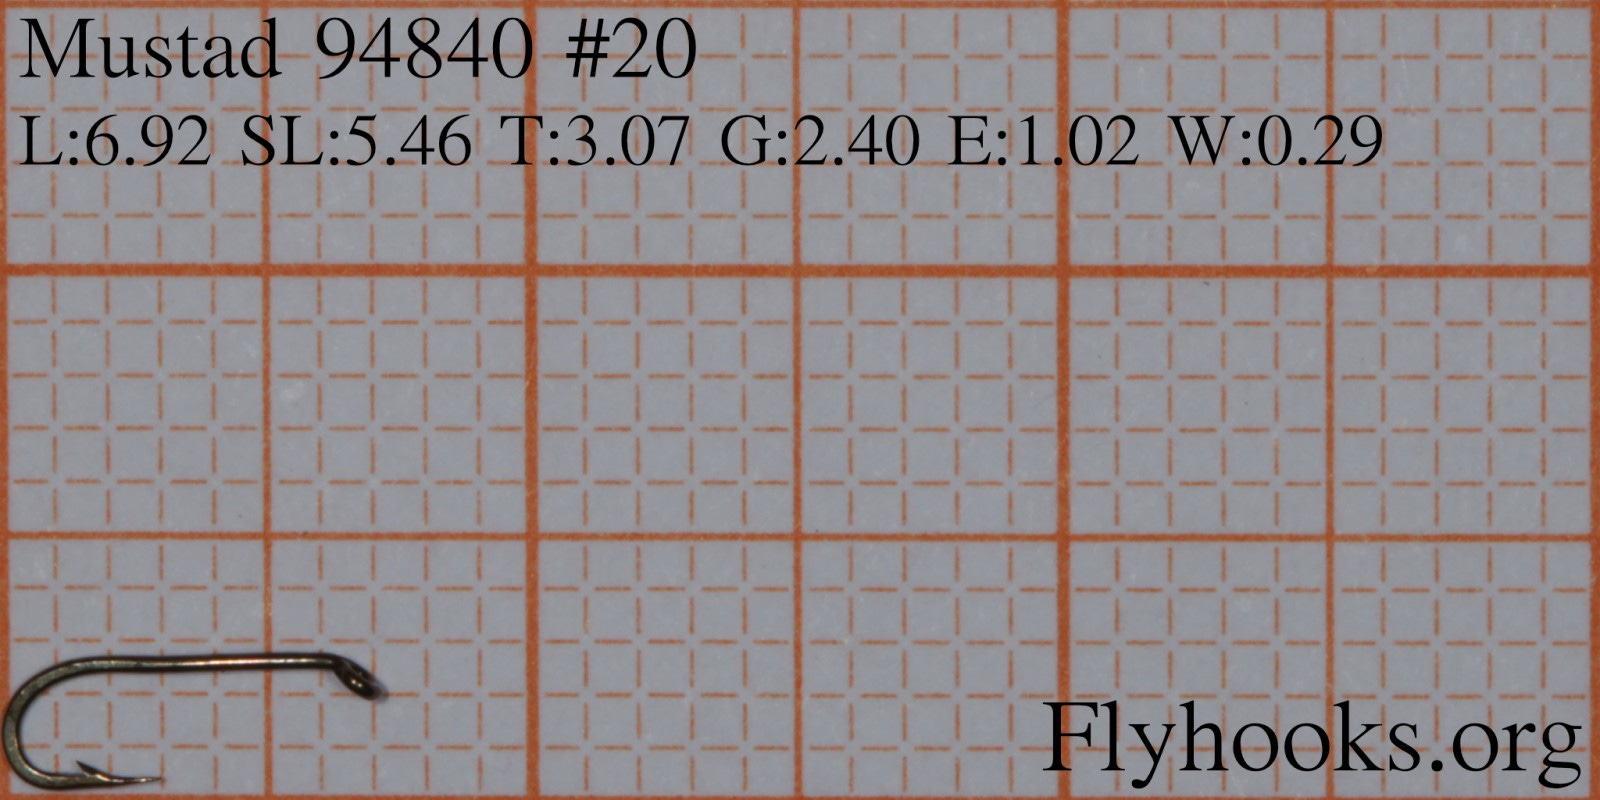
The eye of that hook will now actively impede hooking.
The savvy hook designer often solves this issue by increasing the bite of the hook. The front length now starts further back and allows them to give the hook a decent front length without crowding the eye. Other hook makers resort to offsetting the point of the hook to enhance the hooking ability of a hook, and that’s a good and valid technique. In fact you ought to just do it to all your hooks. Hold the hook in a pair of hemostats such that you pinch all of the band and point of the hook. Then gently pull the eye of the hook to one side or another to put a slight bend in the hook at the point where the hook transitions from the shank to the bend. (in the passing this applies to all sorts of hooks not just dry fly kooks. In fact the curved hooks used for things like scuds and midge larva have notoriously poor hooking characteristics in the smaller sizes. The old Partridge K4A hooks and more recently the Daiichii 1120 or its Orvis equivalent have offset points.
Hook length and its relationship to the length of the natural’s body has an immense impact when dealing with caddis.
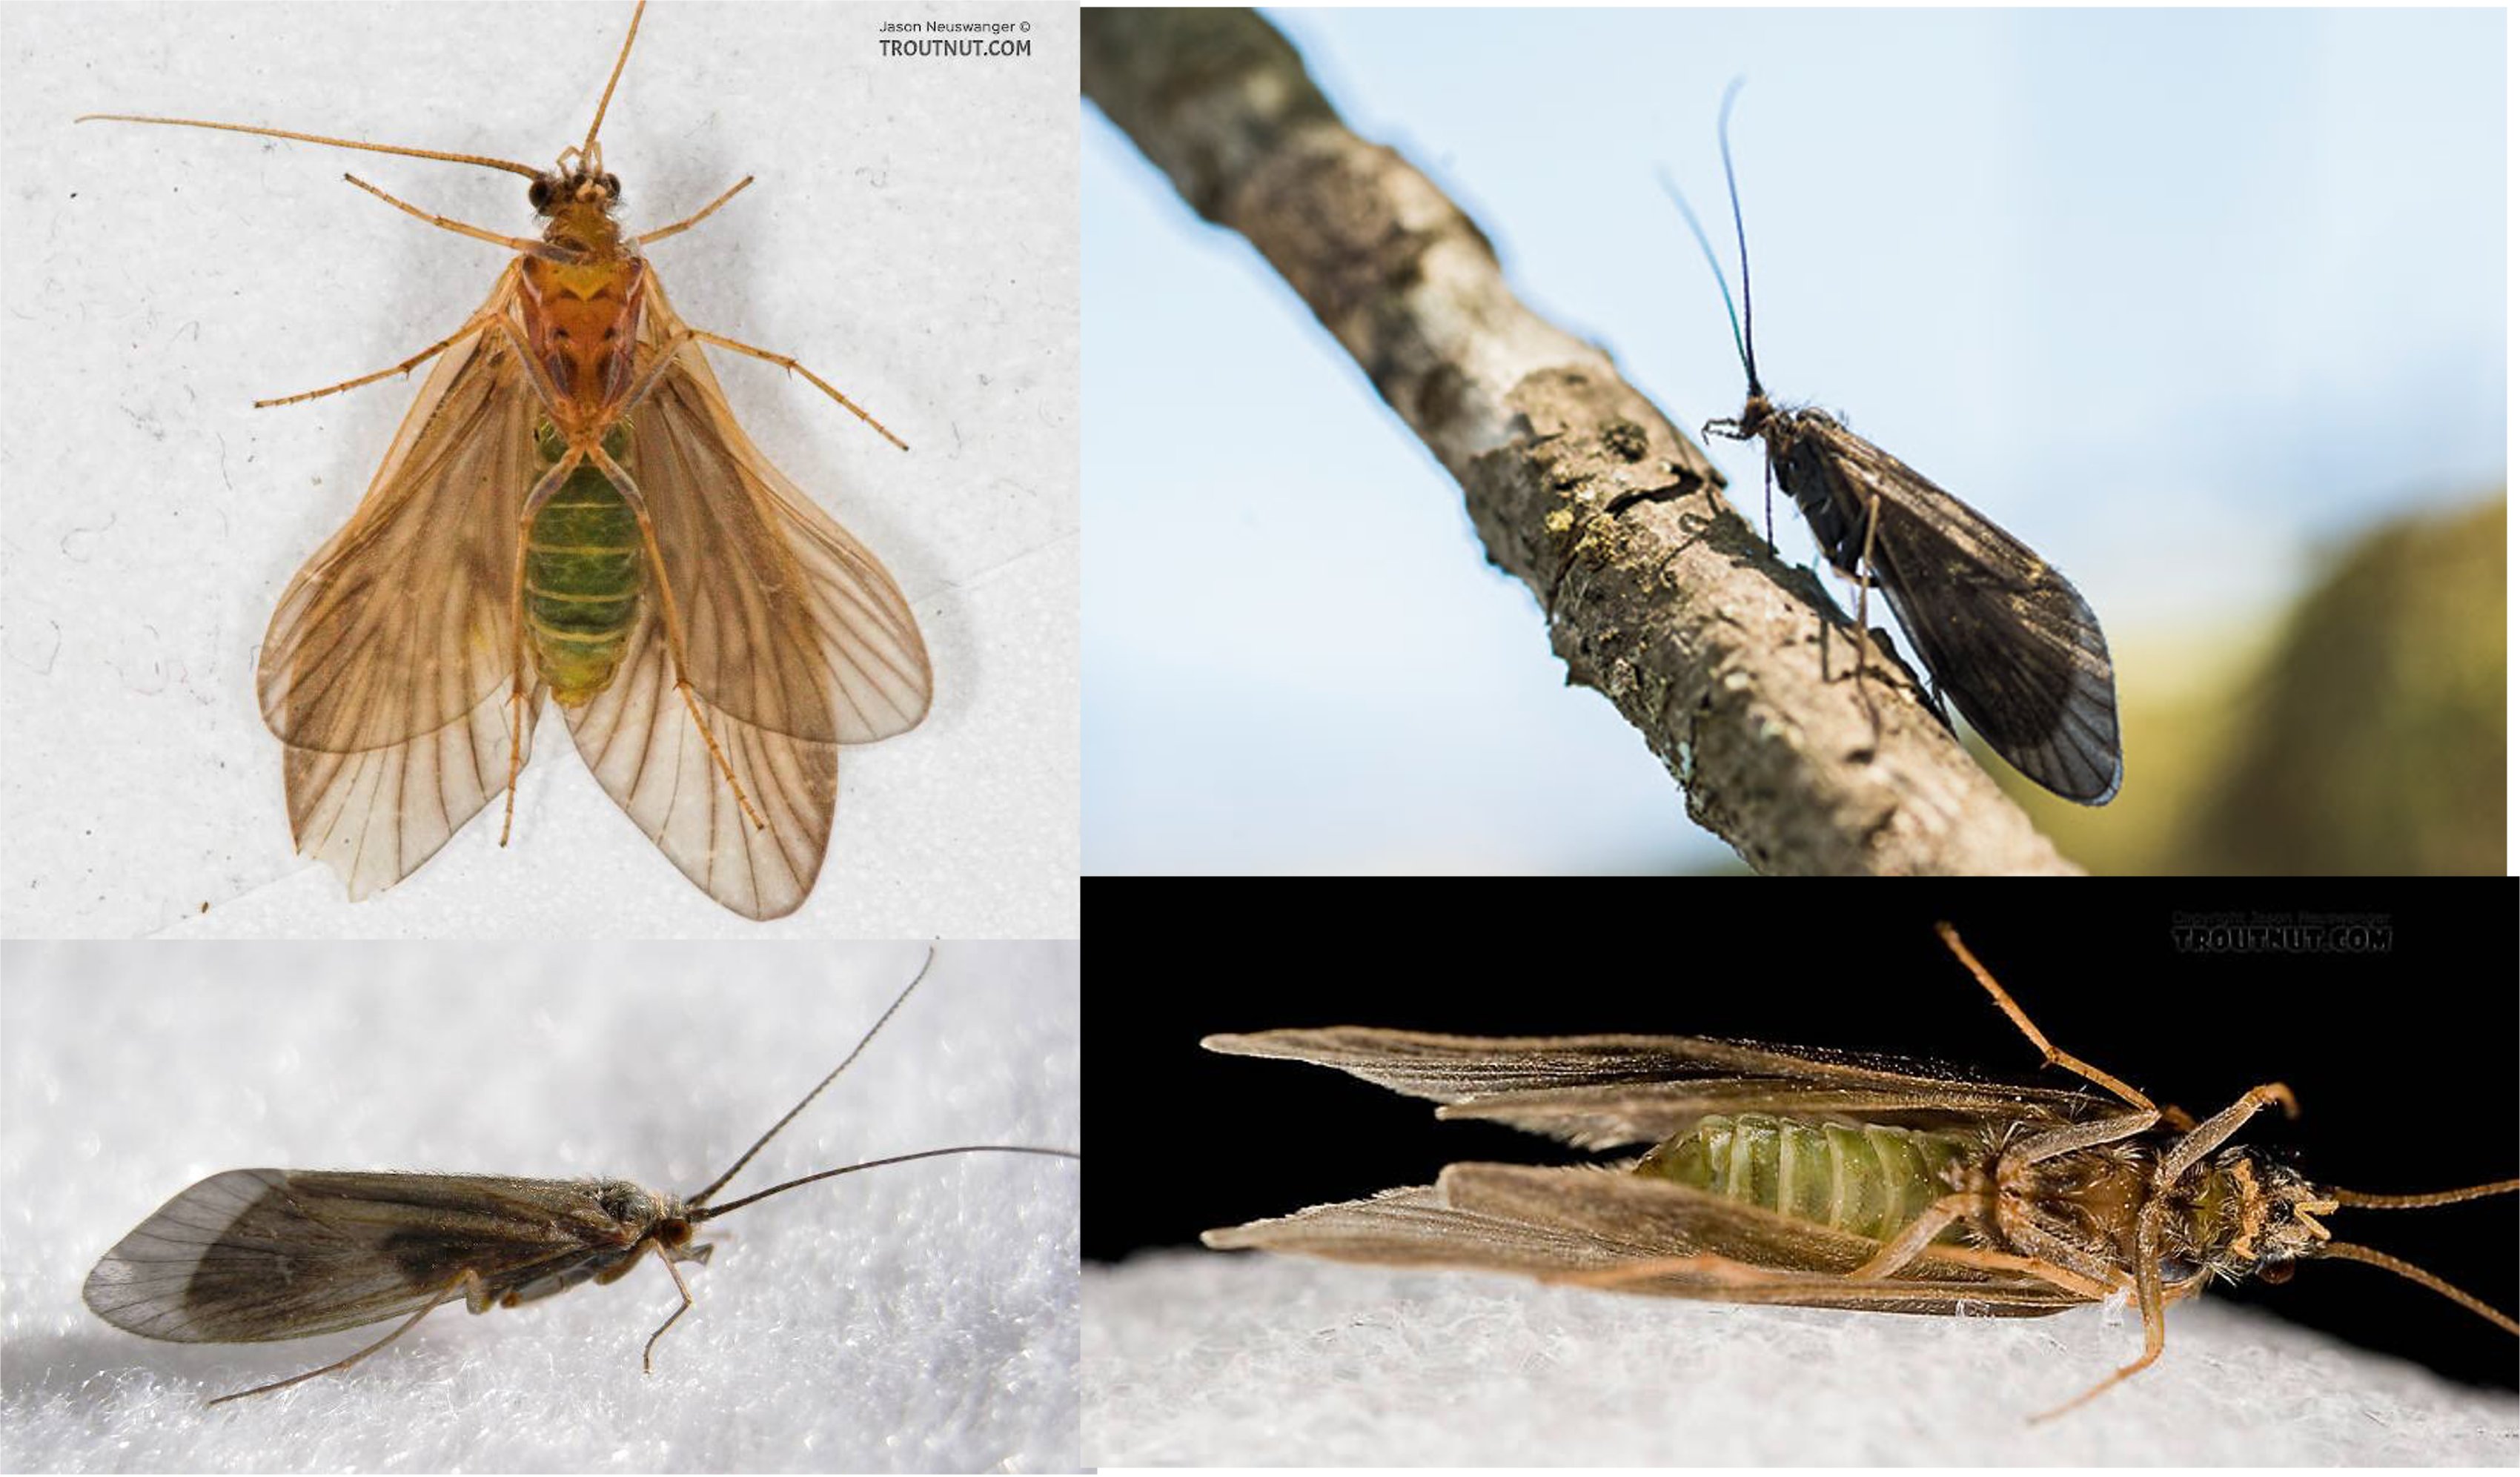
As we had discussed in a past segment, the body of a caddisfly is substantially smaller than the wings. But what we see when the fly is at rest of flying is the size of the wing. If we believe that the trout are even halfway sensitive to the size of the hatching or spent fly, the size of the hook and body must closely match the natural, which is substantially smaller than what the wings may lead one to believe. Which is why wide gape or shorter shanked hooks are so important to tying caddis patterns. Down to a 16 or so my personal favorite used to be a Partridge Capt Hamilton (L2A, L3A or L5A - the difference is the wire diameter). Those are becoming difficult to find. The TMC-102Y or 112TR make good substitutes as does the Ahrex FW502 or 504.
Also pay some attention to how the actual structure of your fly might affect hooking performance. Lots of stiff hackle, or a stiff wing can steal away from the effective gape of the hook.
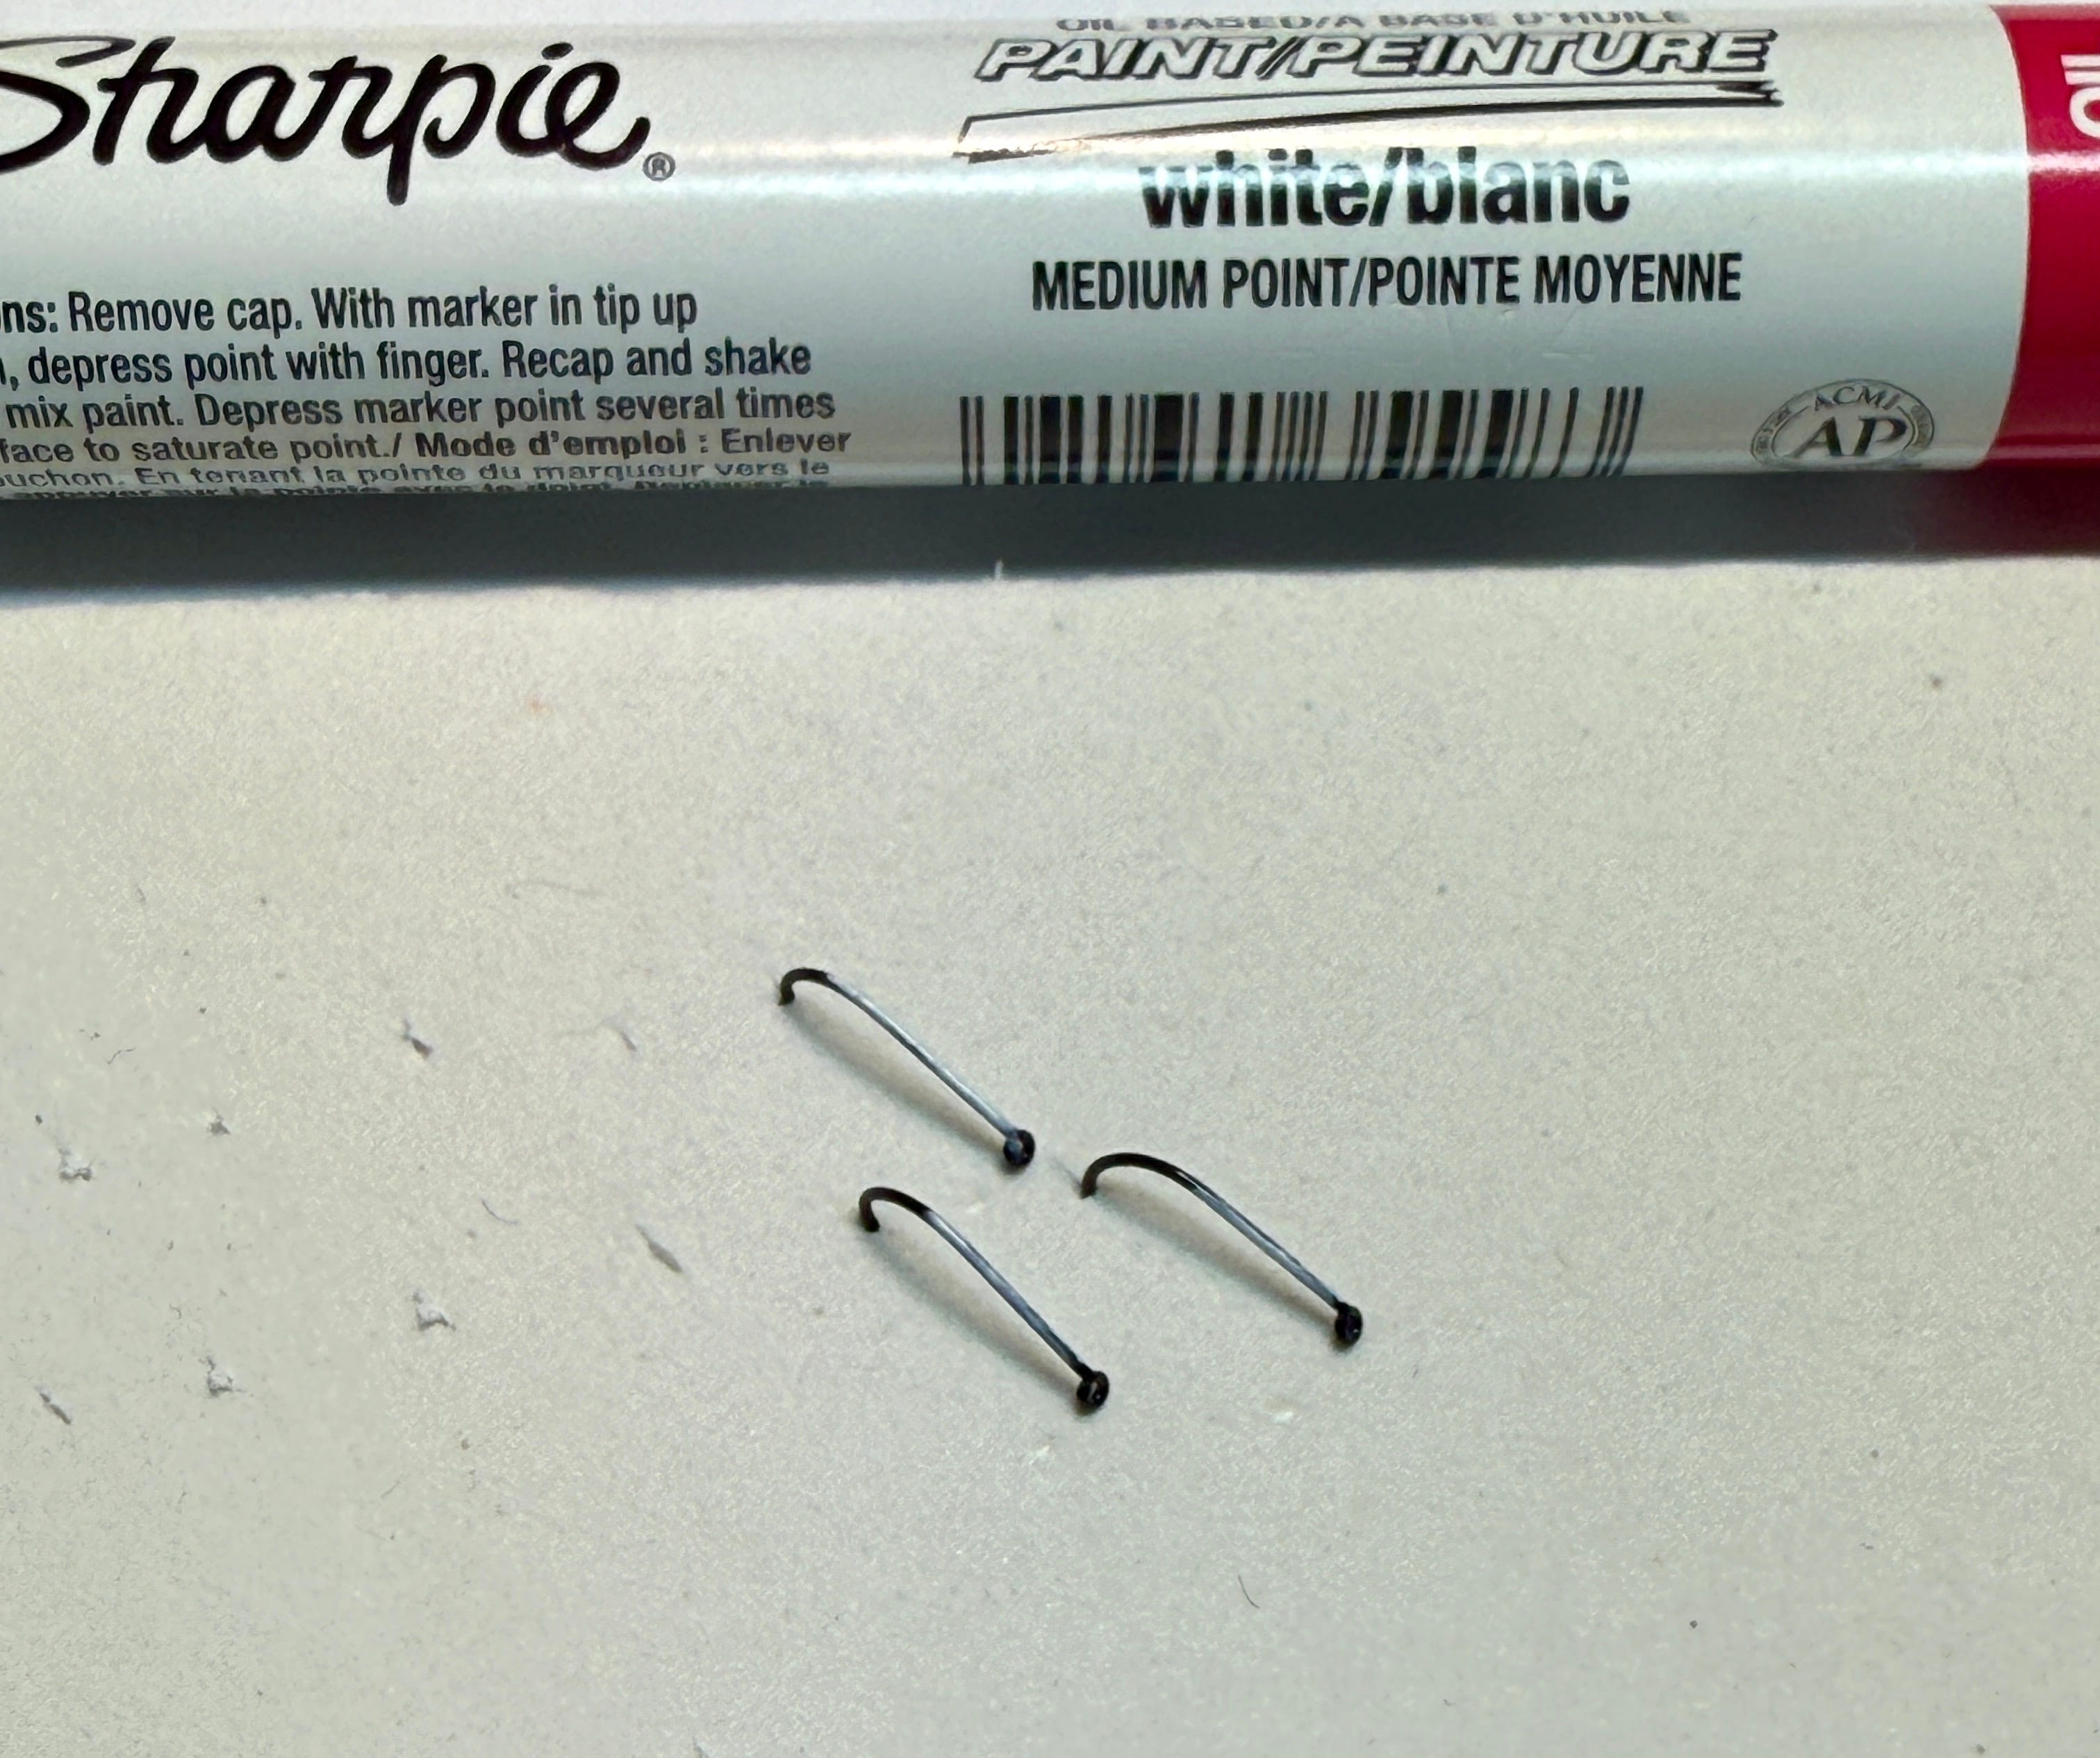
It seems to be par for the course for me, but the hooks I like have a black finish. That’s fine for darker flies, but if dressed correctly will mar the color on a lighter fly. The dark color shows through thread and dubbing as soon as you put floatant on the fly. Without getting into the argument of whether or not the color of the fly matters to the trout, there’s just something discomforting about fishing a gray fly to a trout rising to a hatch of yellow bodied insects.
Fortunately there is a simple solution. It does involve an extra step in the tying process, but it’s worth the extra 10 seconds or so per fly. I paint the shank of the hook using a paint pen. Stick the hook into some foam to dry and then go ahead and tie your fly. The darkening effect will be gone. Do note that the picture below shows a Sharpie paint pen and not a marker.
There are obviously long shank dry fly hooks and they work better for larger flies such as hoppers or the larger mayflies.
While the correct pattern may be paramount in getting the fish to eat your fly, the correct hook is often paramount in being able to hook and land the fish.
We can now return to our regularly scheduled programming. Just remember that the size and shape of a dry fly hook (or for that matter any hook) has a huge impact on your ability to present the correct pattern to the trout and to hold on to him once it eats your fly.