
Basque Cheesecake
It's a cheesecake, how can it not be good.

The Romans had a God for everything, including one for the household and one for the pantry, Lares and Penates. Amongst all other things enjoyed by the swanky Roman Gods these two had the honor of a special sacrificial food - Libum, some say the originator of the cheesecake. This thing was about equal parts cheese and flour. Then along came the Savillum, shown below that leaned a bit more heavily into the cheese. It was sweetened with honey and often flavored with bay leaves (something I think I’m going to try with my next cheesecake).
 — Tasting History")
Time went on and people made all sorts of cheesecakes, baked, cold setting, made with this cheese or the other and flavored in a gazillion ways. Then somewhere along the way, about a million years after Cato the Elder included a recipe for Libum in one of his books the cheesecake arrived in the kitchen of a small restaurant called La Vina in San Sebastian Spain. Here in the hands of one Santi Rivera the son of the couple who founded the restaurant it went through a metamorphosis. It was 1980, things were starting to become somewhat available in Spain and Santi started making cheesecake every so often. But he kind of messed around with a bit, as is the wont of any self respecting baker. I mean, the other guys have already done what’s in the recipe, where’s the fun in following that. So Santi got rid of the base or crust, and a whole lot of the various flavorings and stuff, and made it a little creamier, and a little sweeter and then, for some reason, burned the heck out of it. And it tasted great!!

Then the fame of Santi’s burnt cheesecake started spreading. It went North, and south and east and everywhere else. Eventually it ended up with your’s truly, rather late in the game. But why not, I’m game for another cheesecake recipe.
I tried the basic recipe and it was good, but it didn’t have the zing I wanted. The second time around I brule’ed the top. I figured if it’s supposed to have caramel, let’s give it caramel. But the caramel starts flowing when it melts on the uneven surface and gets sort of messy.
Someone suggested I use a blowtorch instead of trying to brulee it under the grill. I won’t do that. The next time I tried it there was some lemon curd sitting around. (I know, just sitting around). So, of course it went into the cheesecake, and now against all the laws of nature and Santi we had added flavor to a basque cheeseckae. But it sort of worked. In fact my wife said it was the best cheesecake she’d ever had.
So along comes Easter. I get to bake dessert. The wife says make that lemon cheesecake you made. So I made a few.
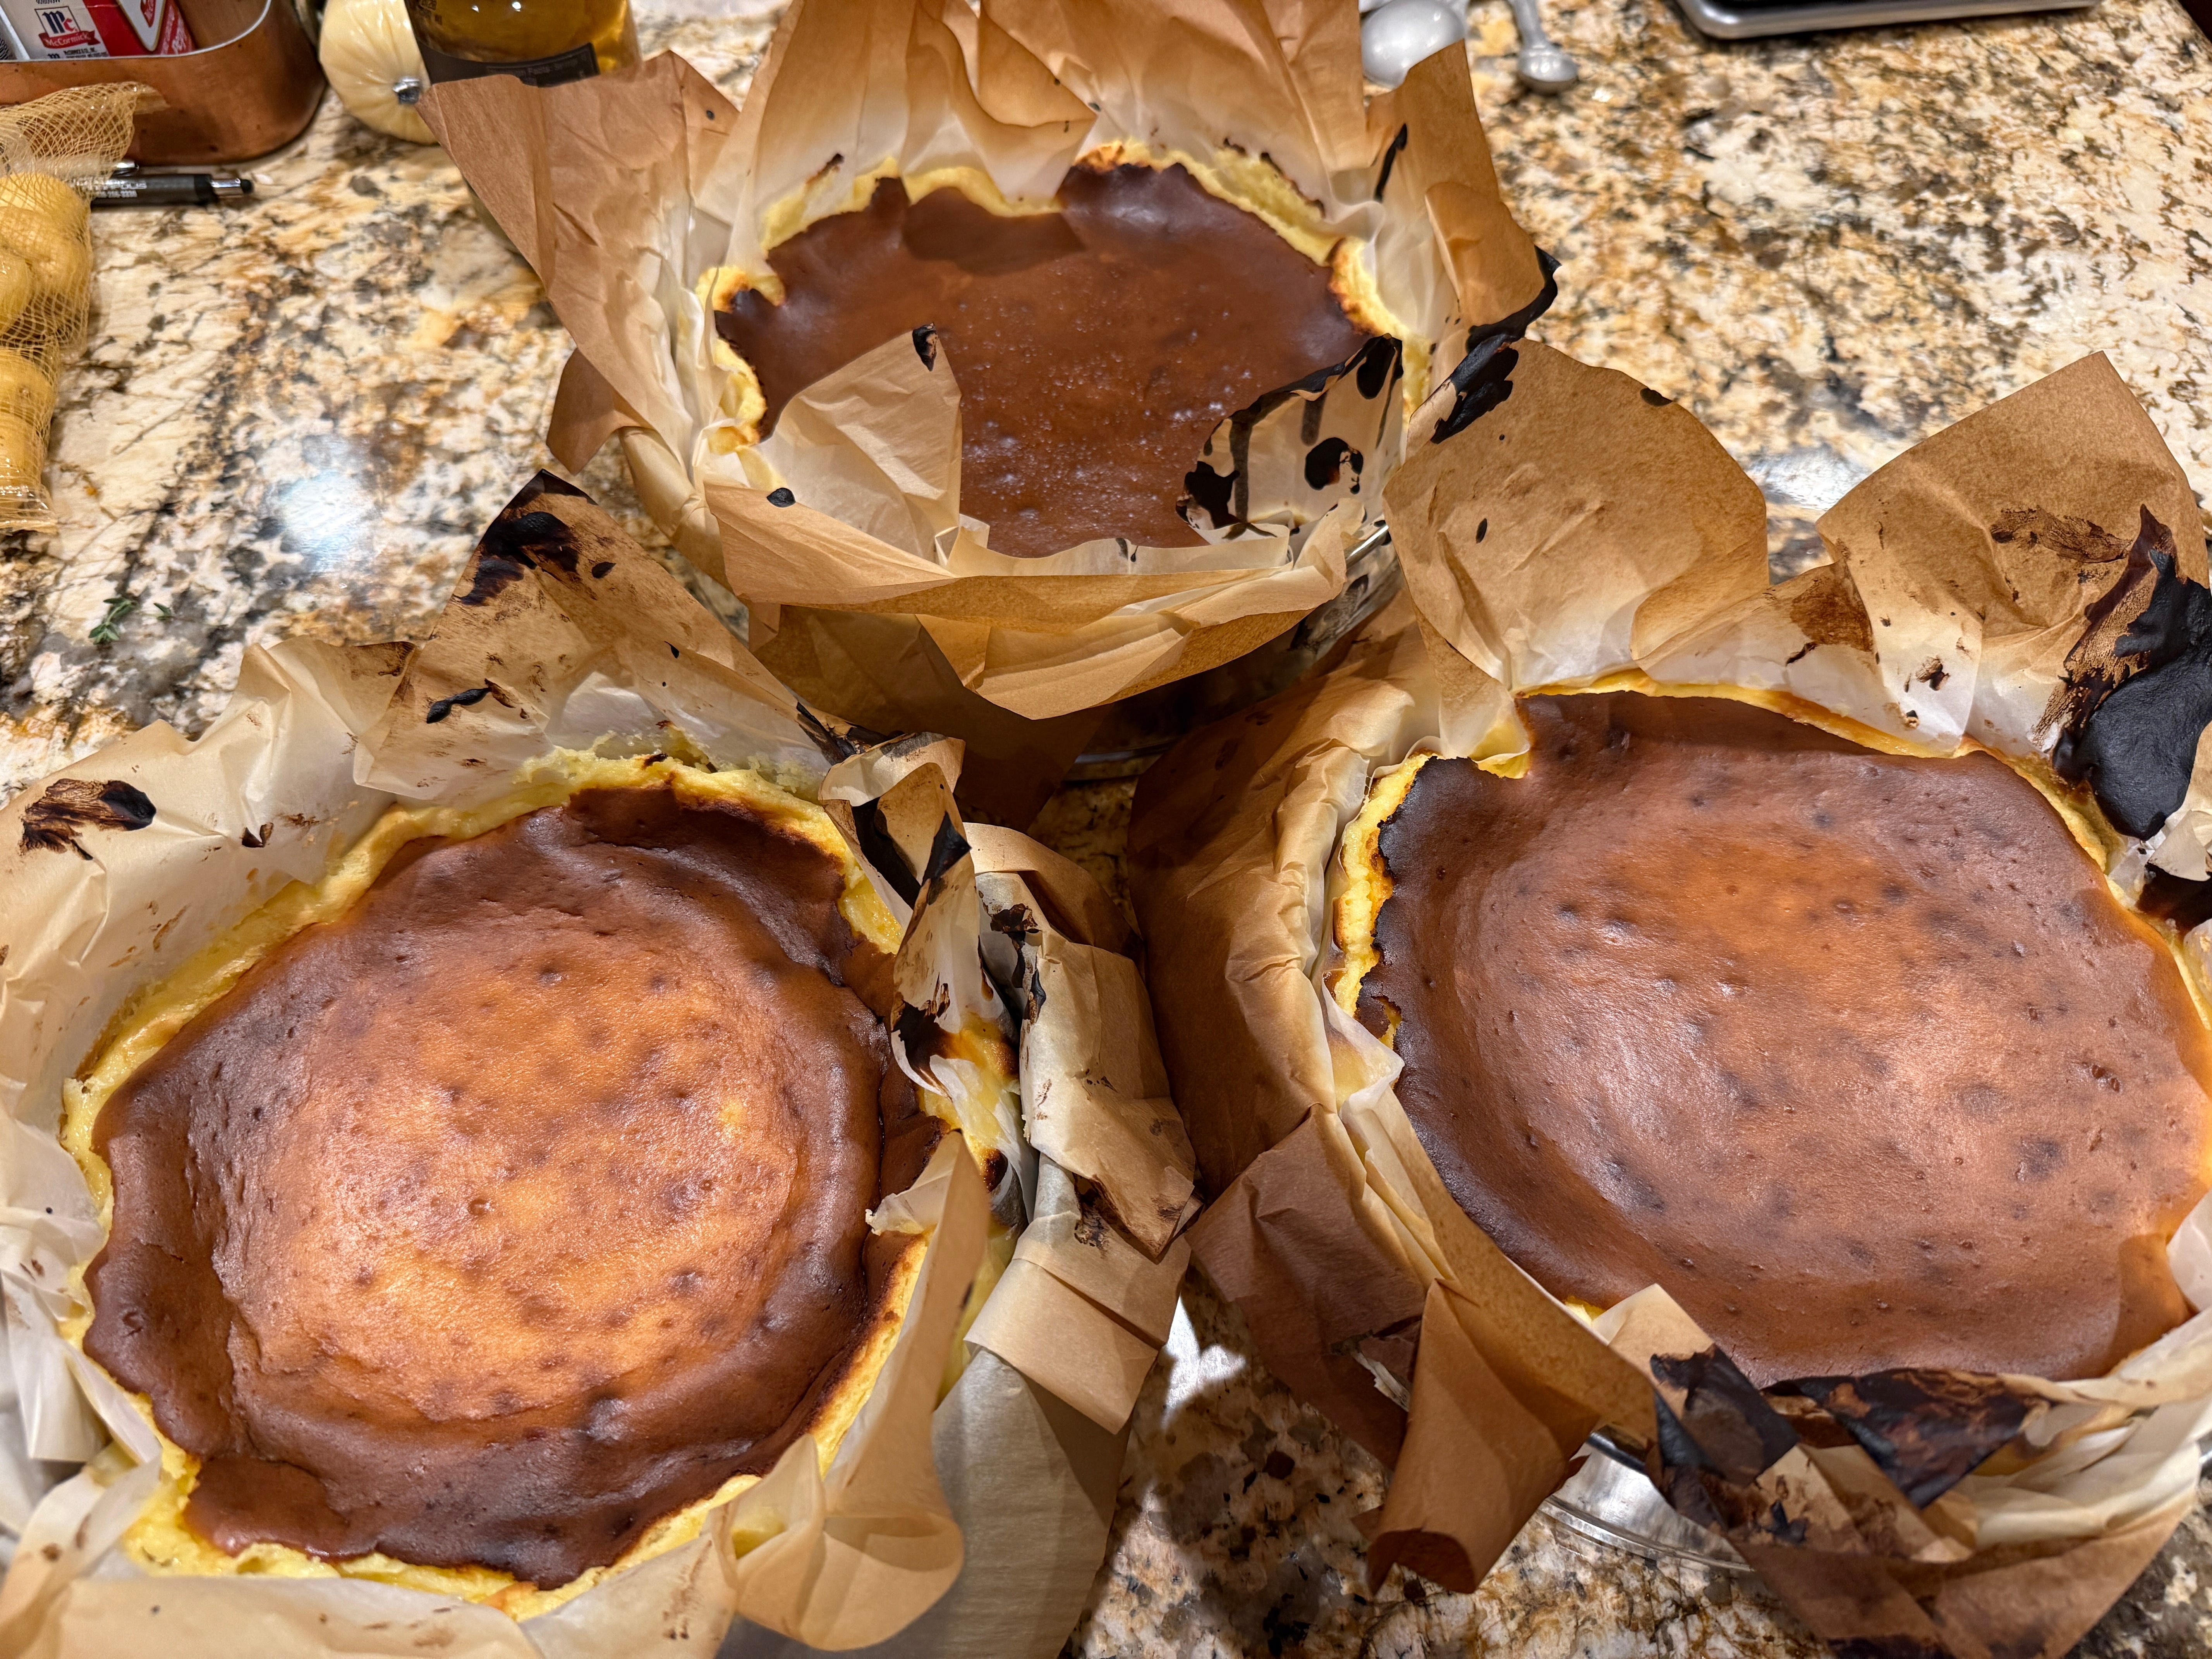
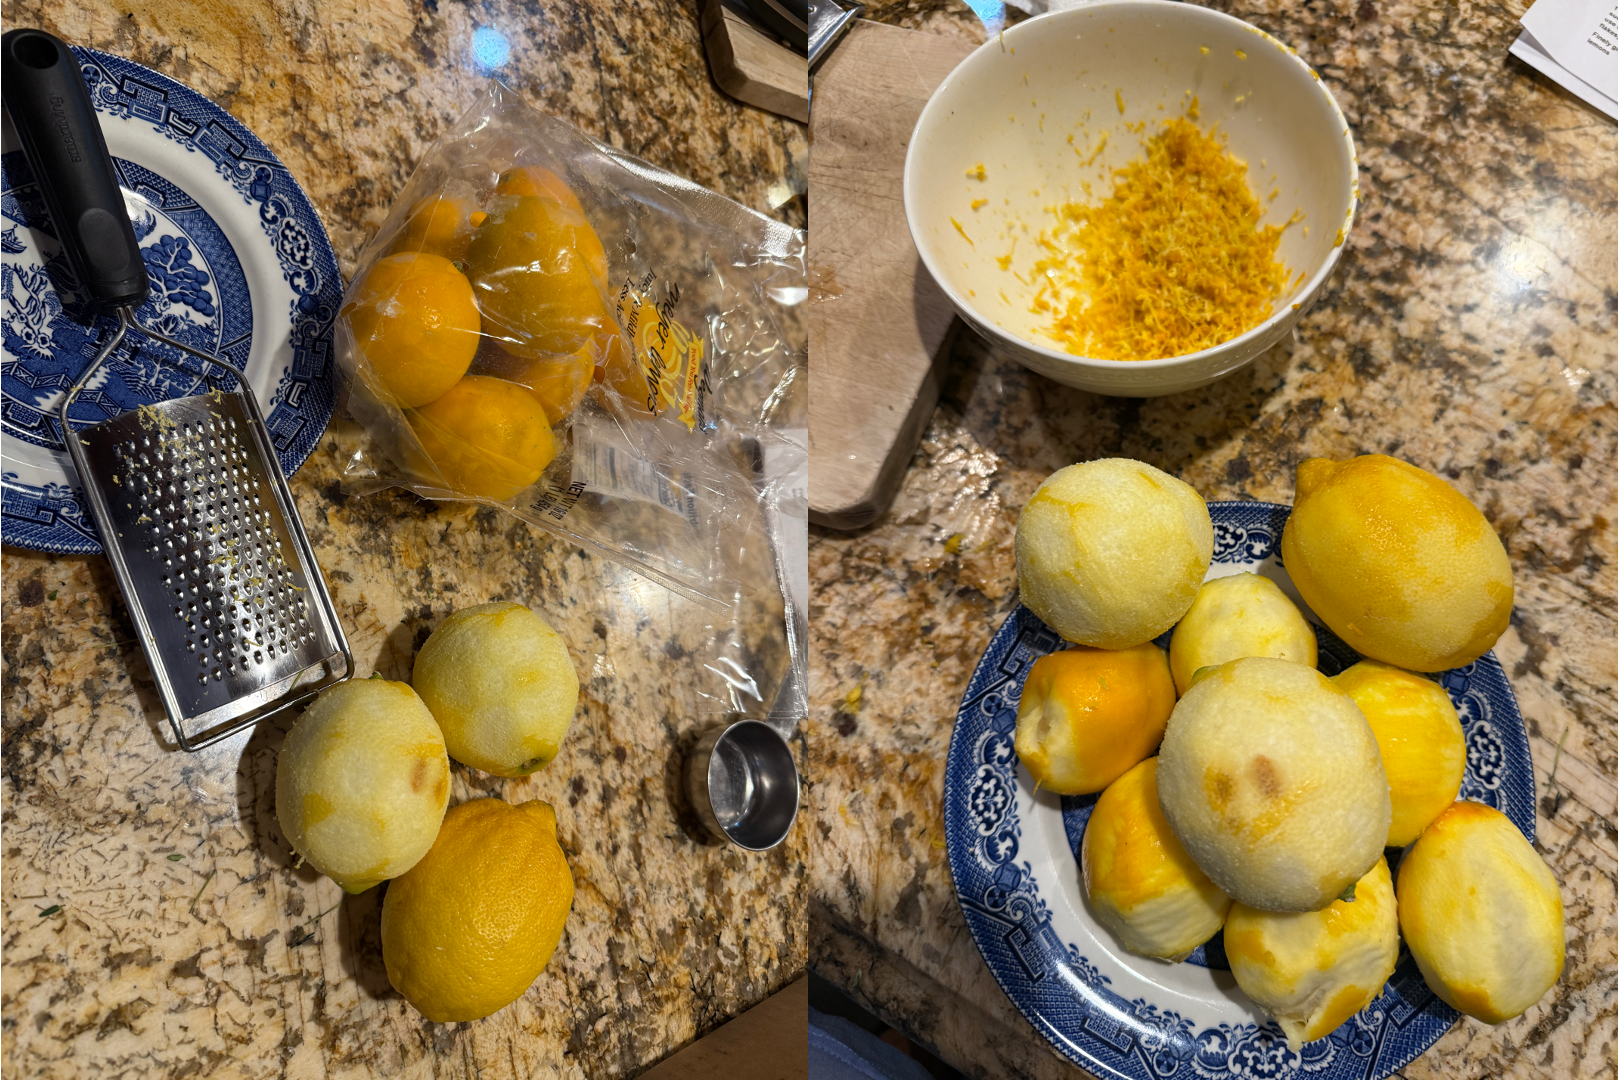
And now I think I have it - the perfect Lemon Basque Cheesecake recipe. I made these on a semi-industrial scale but I’ll just cut the recipe down to size. First sit yourself down with a zester and zest up a passel full of lemons. Then we can get down to business.
Okay, I tried their cute little recipe template. It’s so slow it’d drive a snail nuts. So here goes.
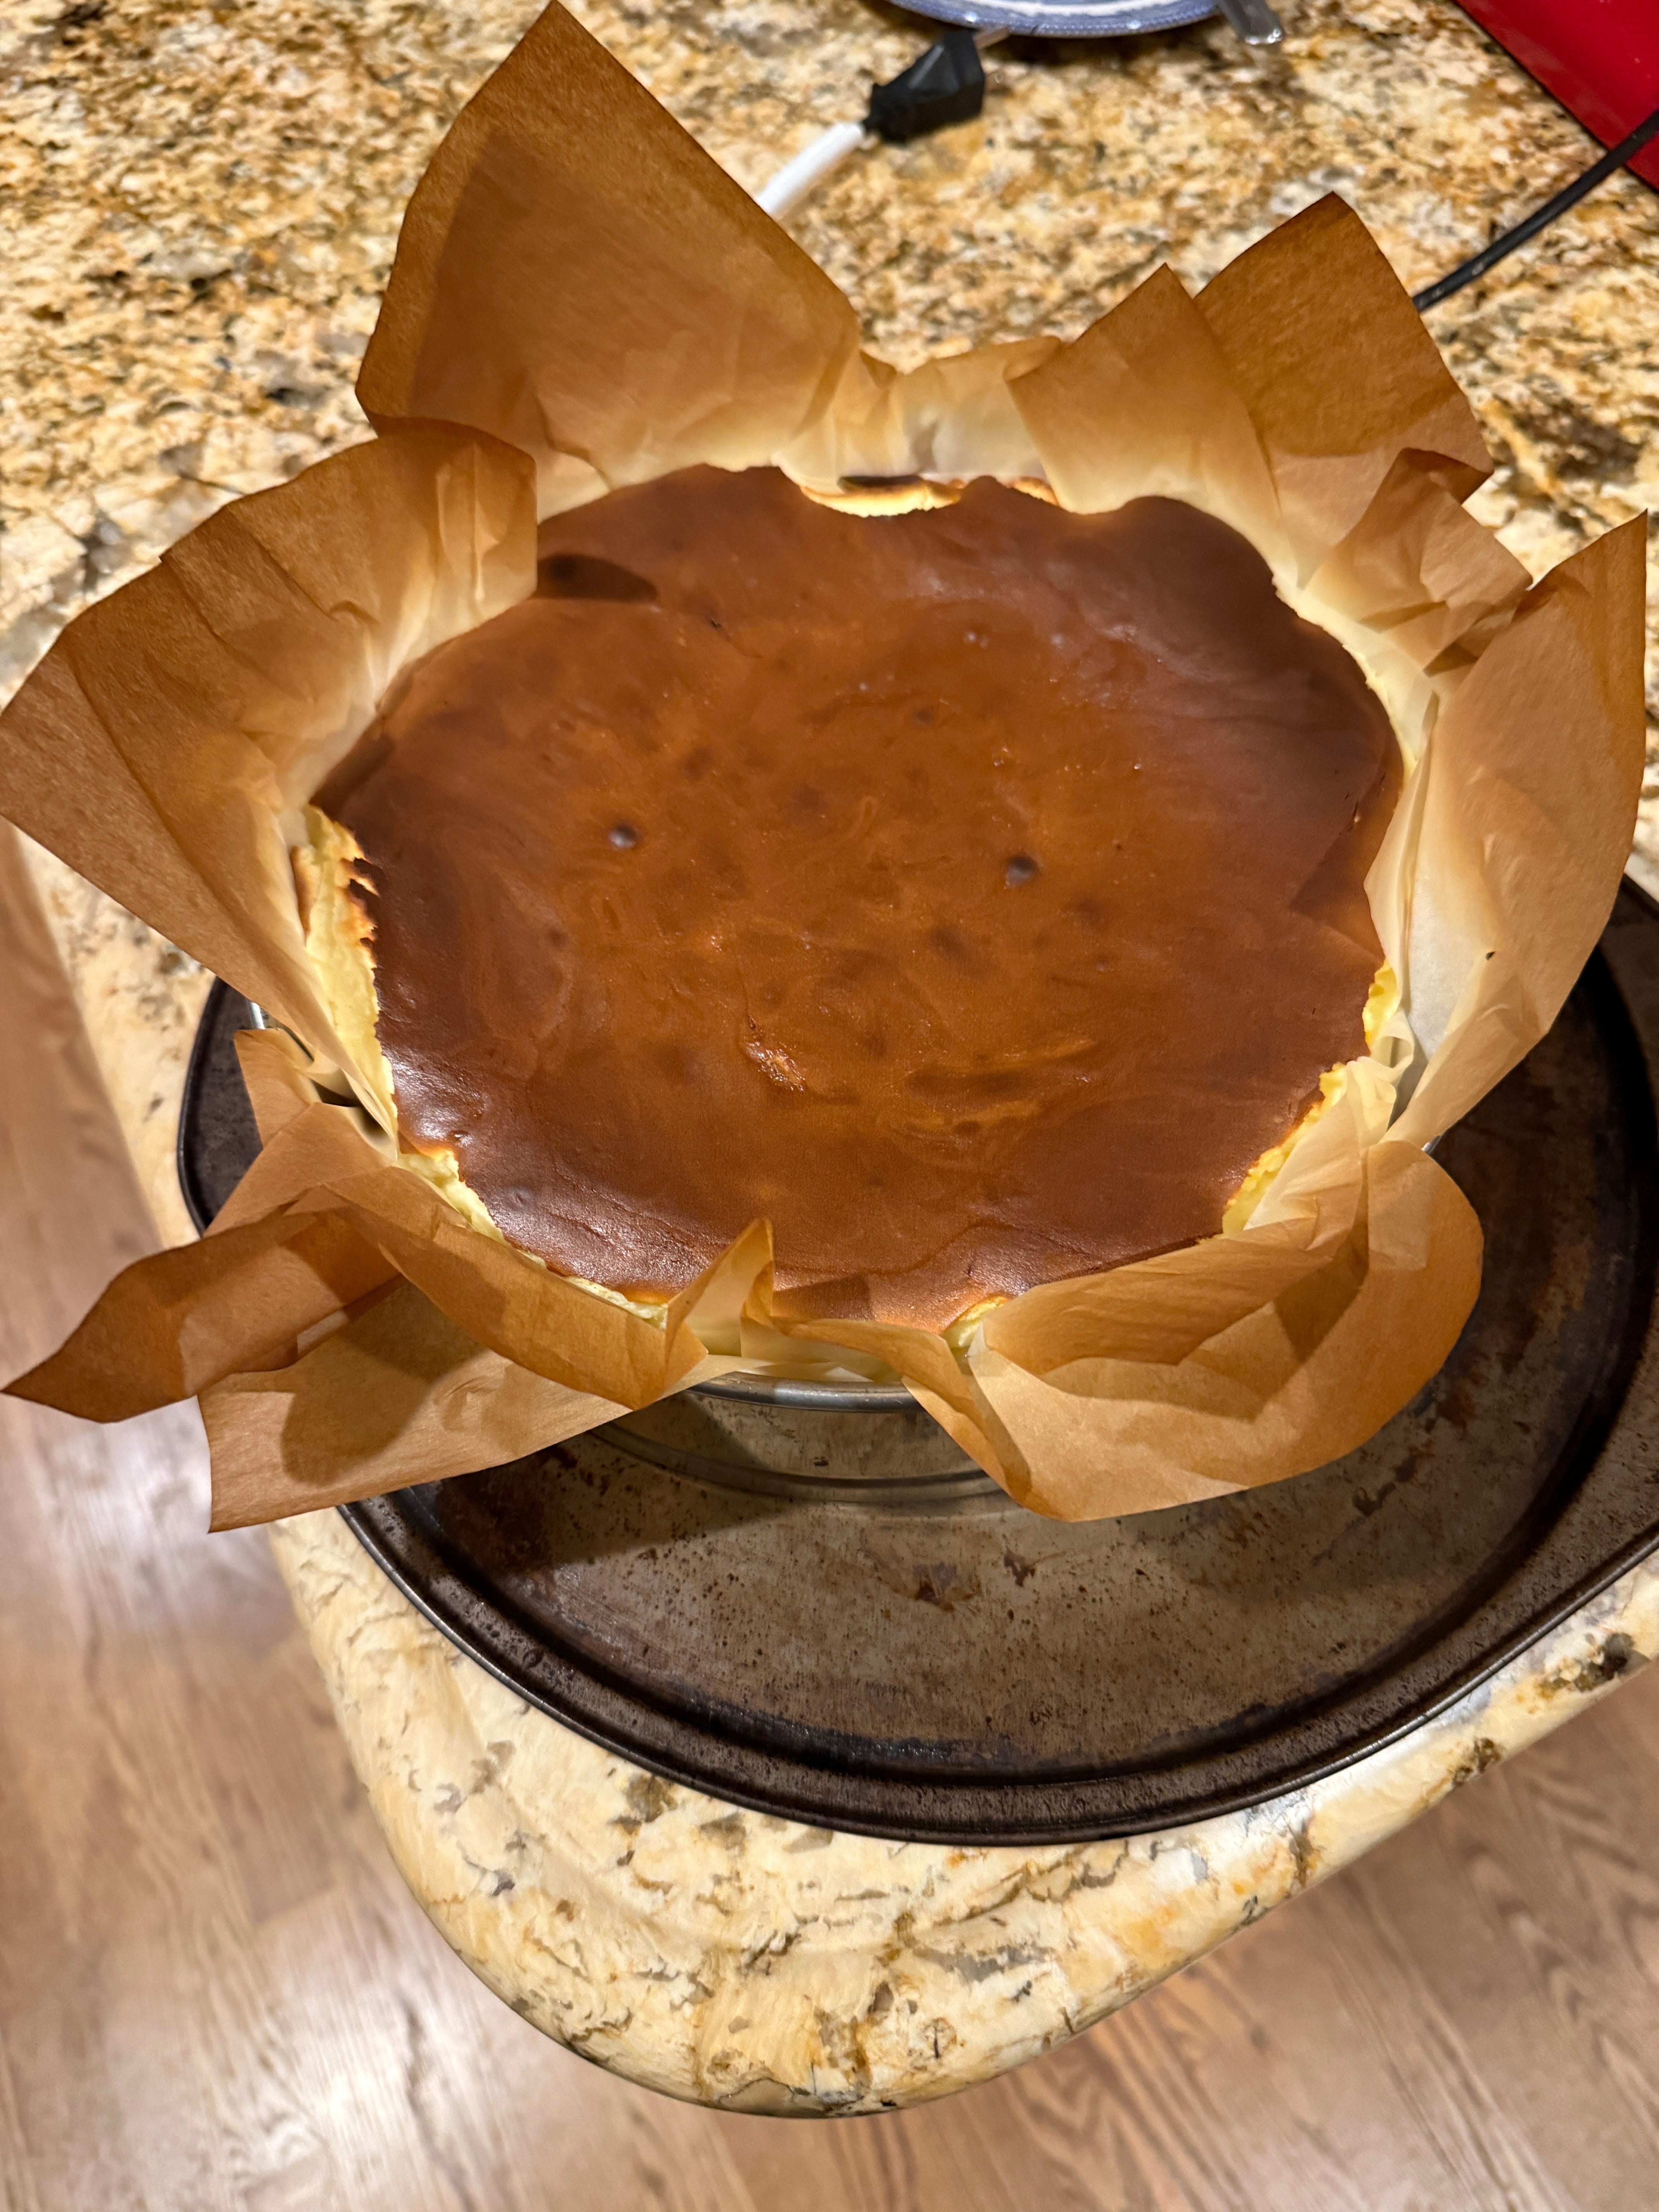
Lemon Basque Cheesecake

Ingredients
3 Meyer Lemons
3 Regular Lemons (they add a little more zing to the Myers)
1 kg full fat cream cheese
225 gms Mascarpone
450 ml heavy cream
5 eggs (the size they now sell as large in the US)
2 extra egg yolks
350 gms sugar
1/4 tsp salt
30 gms of all purpose flour
Parchment paper - enough for 3-4 layers in a 9-10-inch springform pan

Method

1. Get all the ingredients to room  temperature and start your oven preheating to 220C/ ~425 to 430 F
2. Zest all the lemons. I always use a cheese grater (See picture above) It works grate. :)
3. Juice all the lemons and mix the juice with the zest and put aside.
4. Cream the cheese and sugar until smooth using the paddle attachment on your stand mixer, or any other thing you can find to beat the living daylights out of this, I don't think it matters.
5. Once it's smooth add in the zest and lemon juice. This will tend to make the mixture congeal a bit but beat it back into submission.
6. Keep beating this thing while drizzling in the heavy cream. I found it gets better if the mixture is a little airy at this stage.
7. Beat all the eggs together in a bowl along with the salt.
8. Sift the flour into the mixture and mix in.
9. Add the eggs in about one egg at a time, constantly beating the mixture.
10. Somewhere along the way line your springform tin with parchment paper. You want 3-4 layers at about 45 degrees to each other with enough sticking out on all sides. There is no crust to this cheesecake. The parchment is all you have. And the cake will rise while cooking only to thoroughly collapse later.
11. Pour the cheesecake mixture into the springform pan and bung it into the oven.
12. Leave it the heck alone for about 30-35 minutes depending on your oven. Everyone's heats and cooks differently. Mine is slower and so I leave it in there for 35 minutes.
13. Now open the oven and shake the tin. The cake should have puffed up and rise a bit. There might even be a crack around the circumference. When tapped the center should jiggle. Not a big sloshing around thing. More like this.
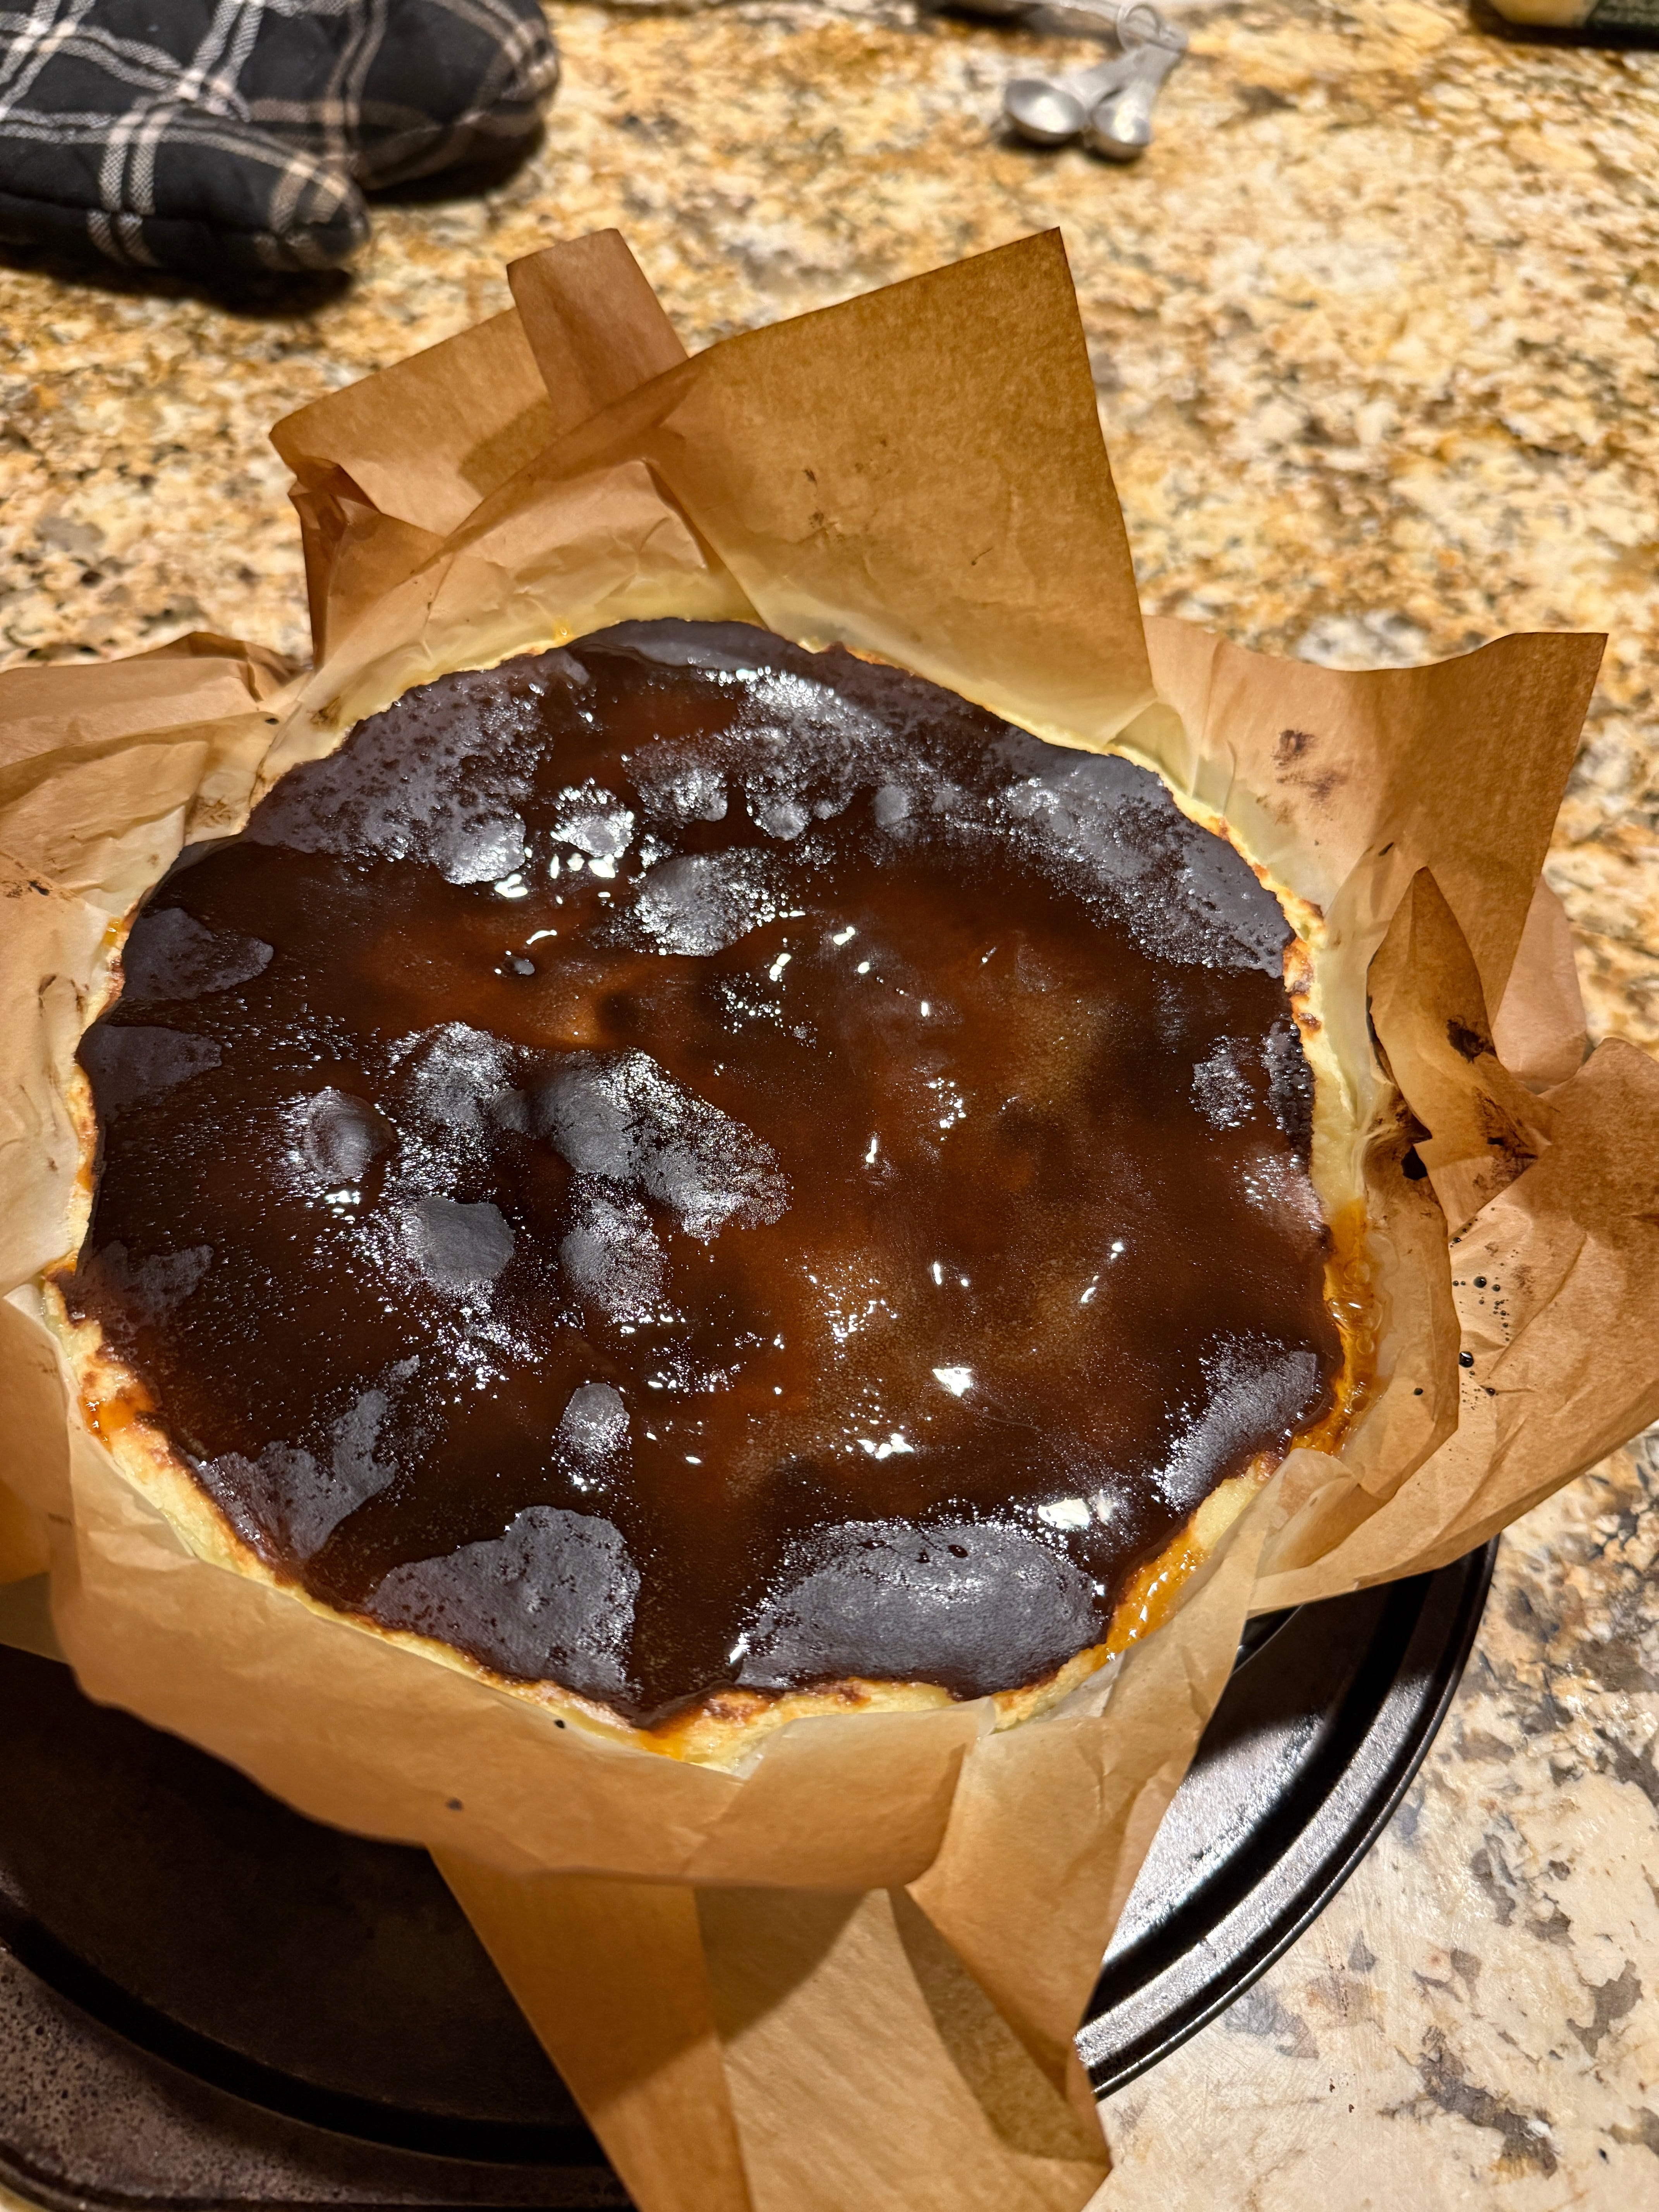
And the top should be nicely caramelized. If it isn't or the jiggle is too loose, let it be in there for another 2-3 minutes and try again.
14. When ready, take it out and let cool completely. You don't have to cool this like a regular cheesecake. The caramelized top  holds it from splitting apart. The cake will sink in on itself. (see pictures below).
15. Refrigerate once cooled, but yank it out of the fridge for a mite before serving. You want it closer to room temperature than fridge temperature. It tastes and feels better.
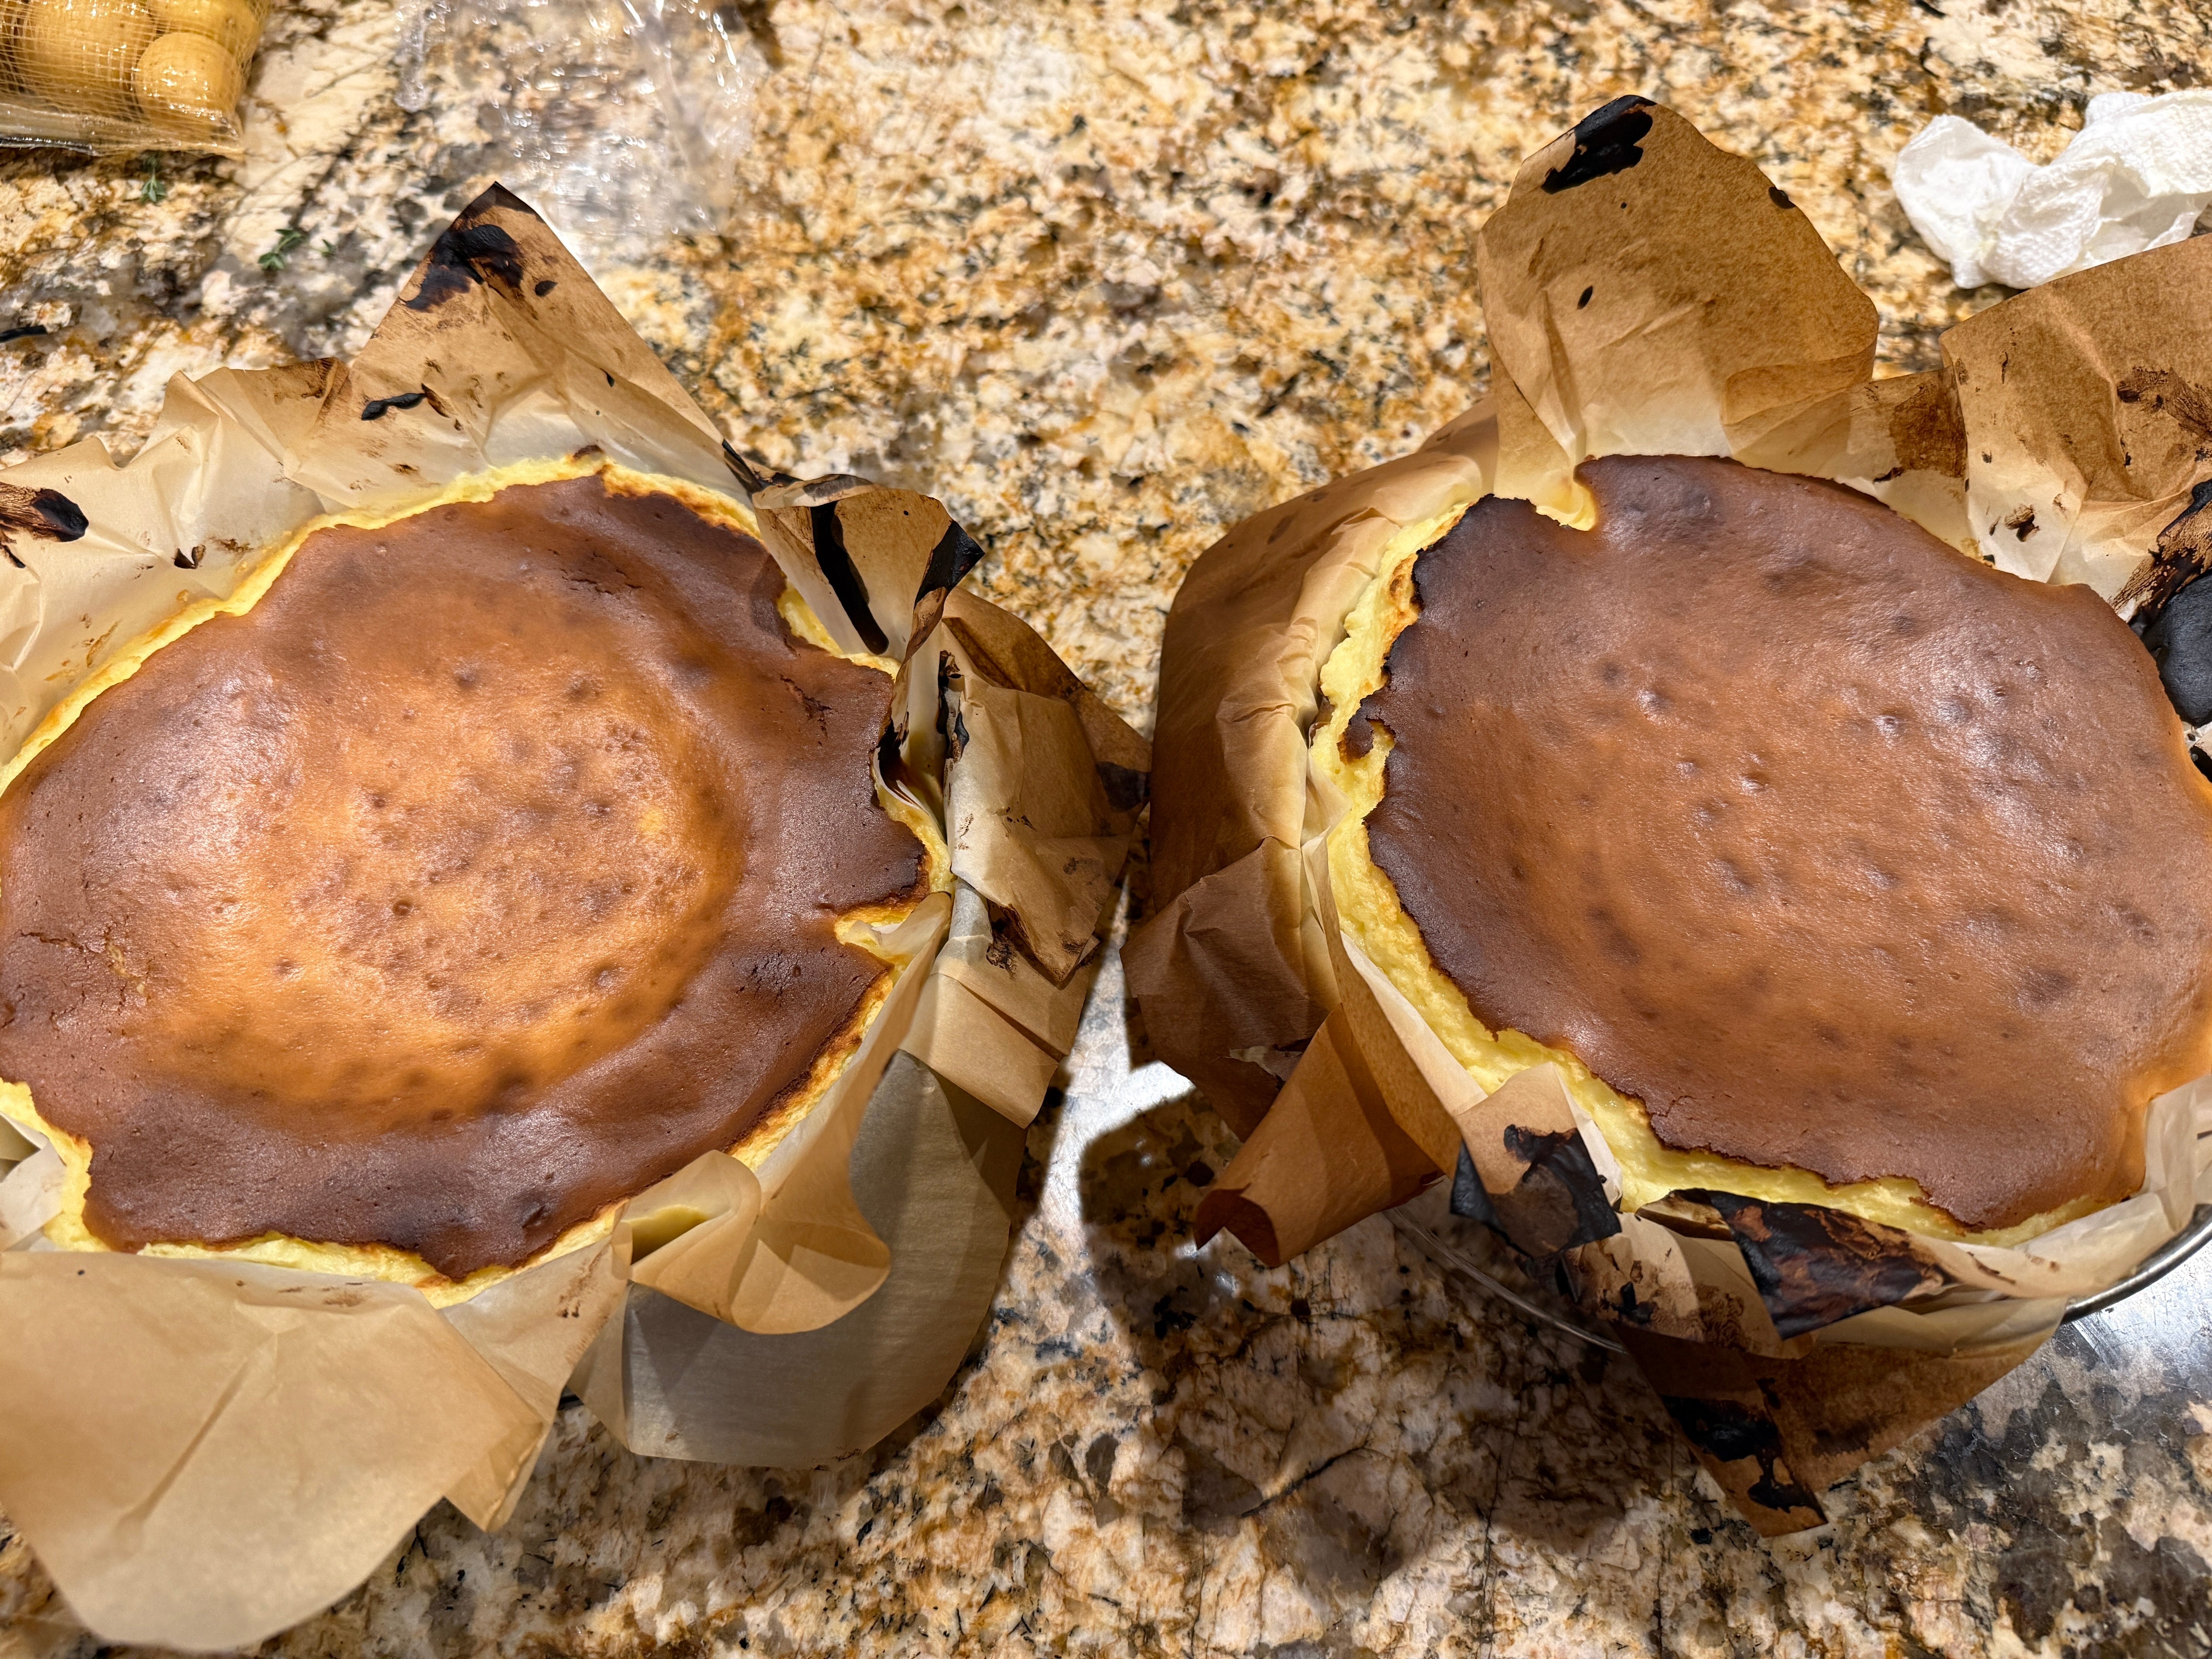
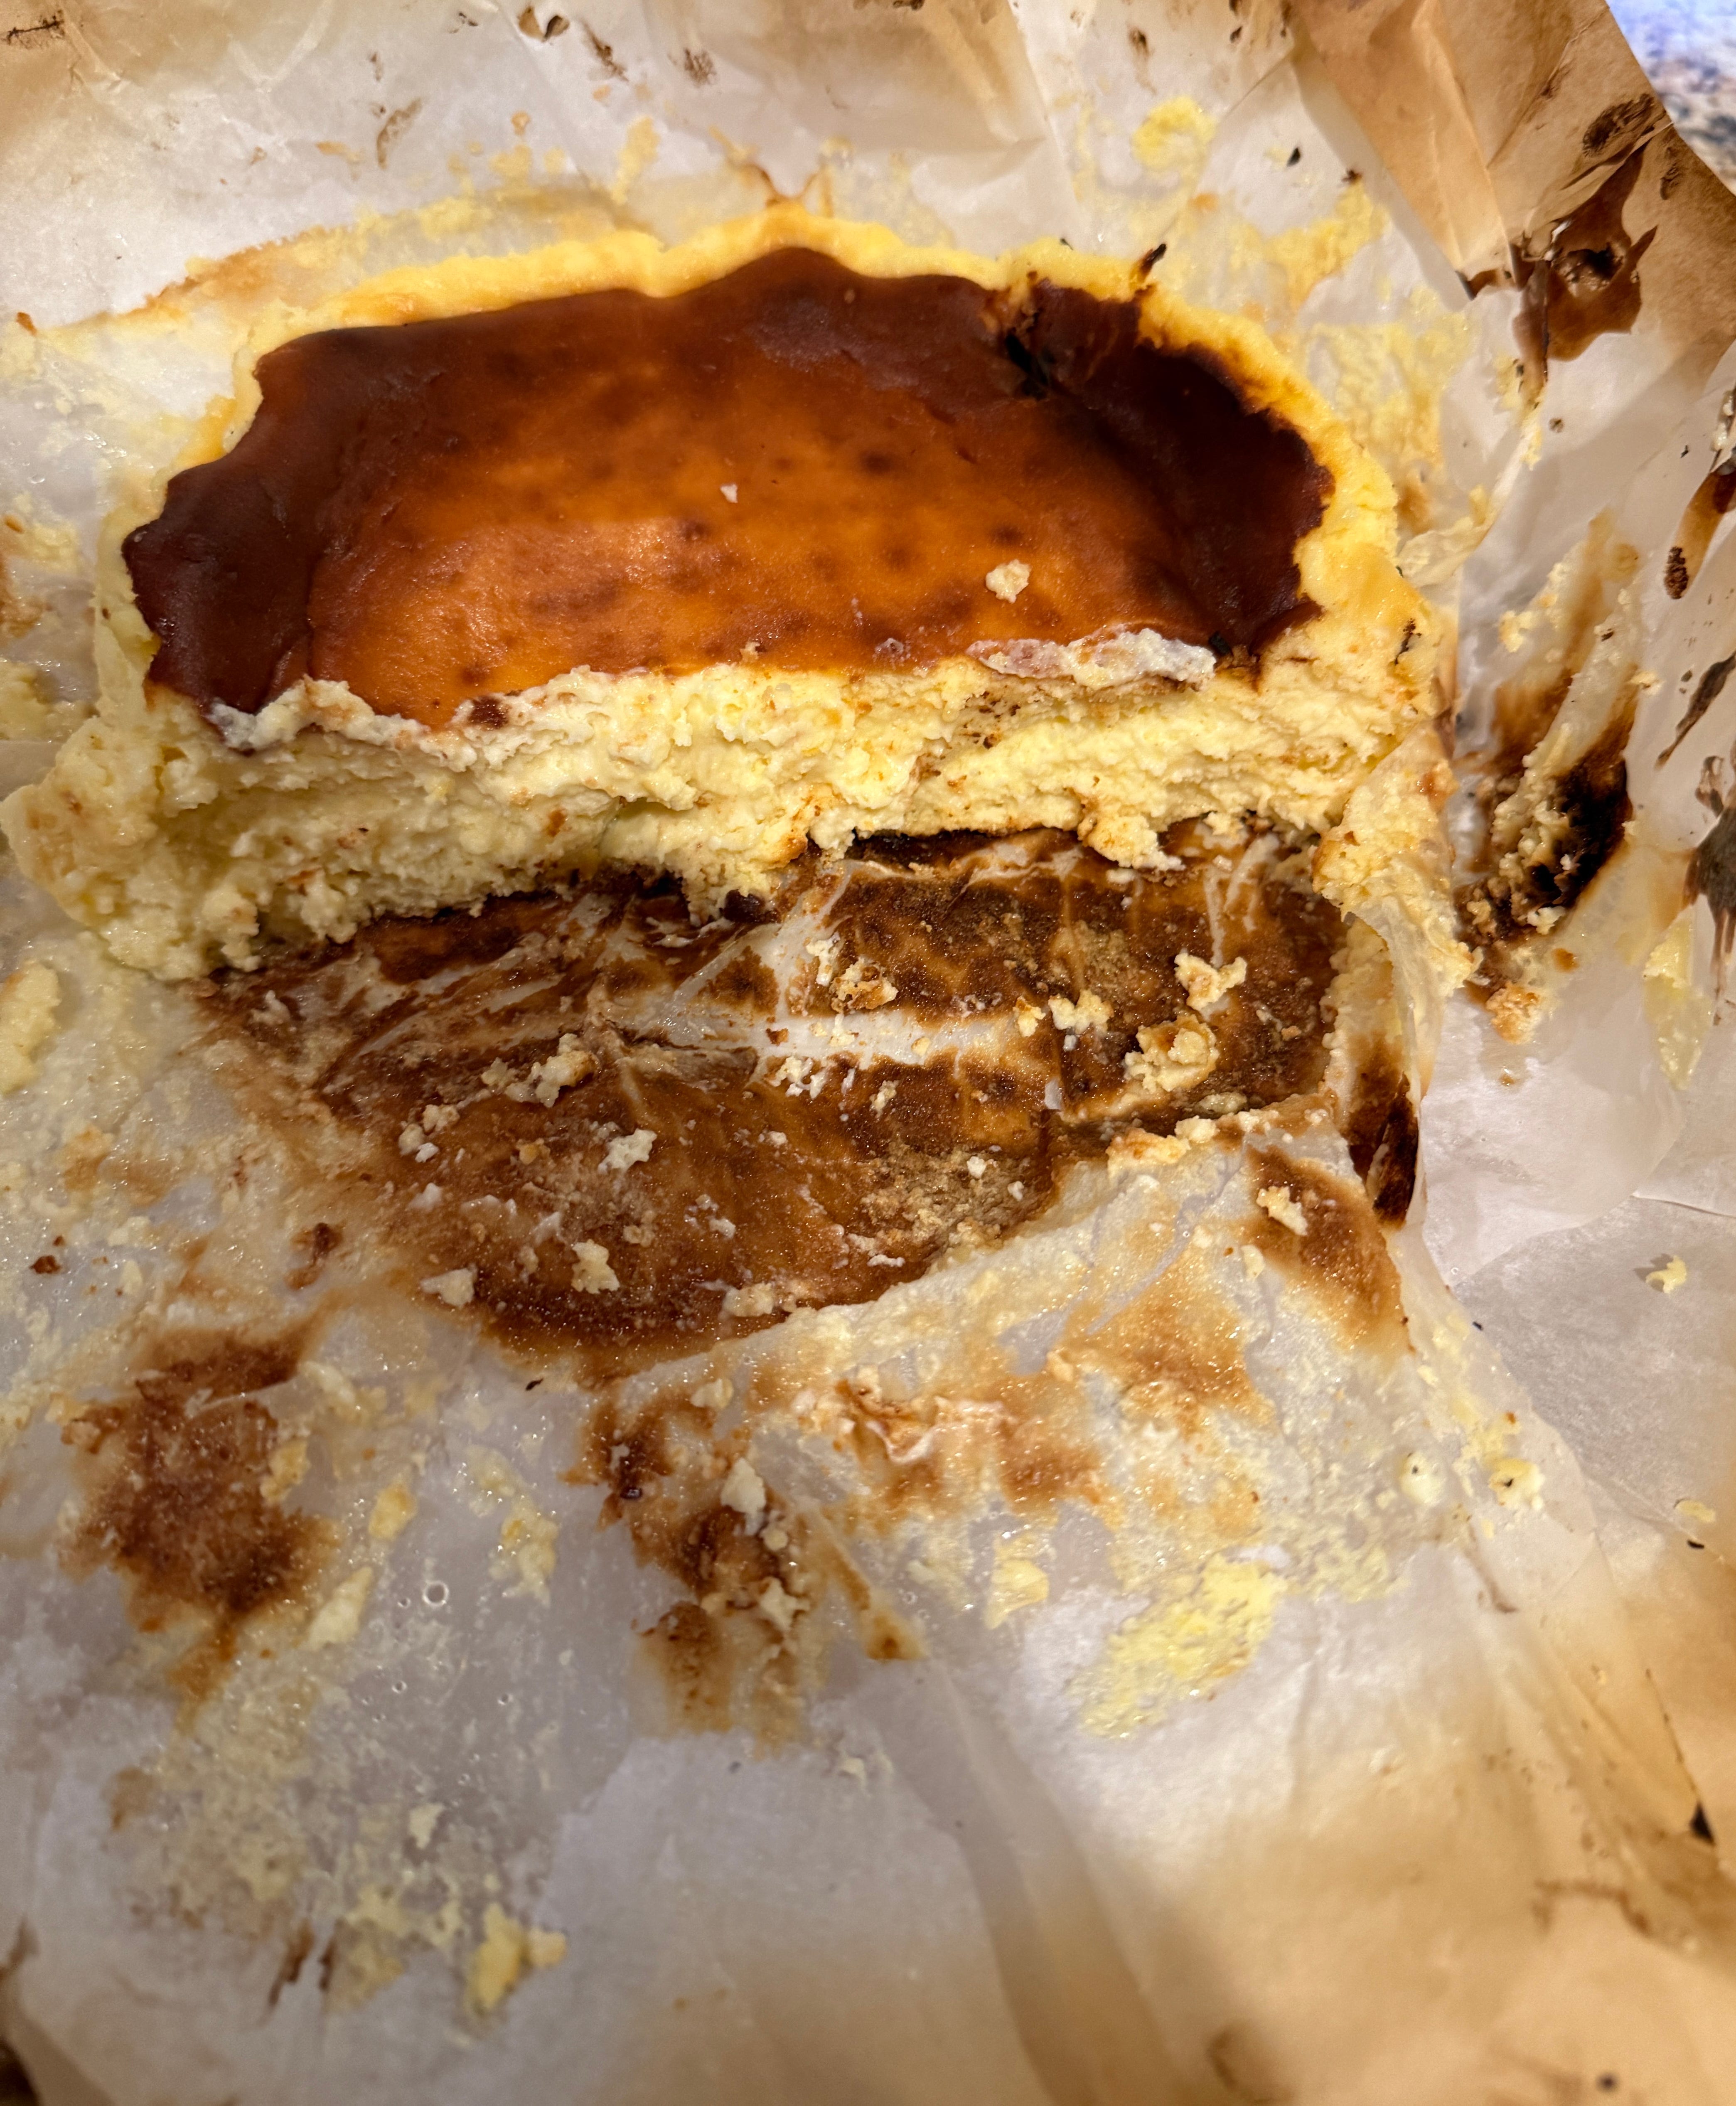
The resulting cake is a a little firm around the edges, but soft, smooth, creamy and so good in the middle. Serve this sucker right off the parchment paper. Anything else and it’ll all fall apart on you. Run a sharp knife under hot water to cut with.
Enjoy.
Fantastic as always! One little tip if you want even more zing in a cheesecake: add a couple teaspoons of white vinegar to the lemon juice, or 1/4 tsp citric acid powder (“sour salt” at the Indian grocer).